I had a very interesting thing happen on my way to a big concert held at the Boston garden earlier this month.
We arrived in the Boston area a few hours early, in order to have some beers and dinner before the concert. My wife was tasked (as navigator) to decide what bar/pub/restaurant we'd go to and make reservations if possible.
The short version is that she decided we'd be just fine. Lets see where we can seat when we get there. Made even more fun when she found she had other friends going too, and thought we'd all get together.
Needless to say, it can be a madhouse trying to get into any venue around the Garden if they are any good. So, yeah, besides the fact there was also a Patriots game on...
We ended up at a fairly new place called Blakes. It was basically empty. The beer was good, and the limited menu just fine for what we had. I had nachos.
The best part was the bar tender. We sat at the bar and watched him work. It was pretty clear he was not very experienced, and neither were many of the other staff. He also seemed on first blush Russian.
Well we were wrong on that count. He is Spanish. We never asked what he was doing in Boston, probably in University.
What was really interesting was that he had a large tattoo on his forearm.
It was the winged blood drop chapter symbol of the Blood Angels Chapter.
In color.
Apparently he'd gotten it because his family always had "wings and blood" in the family iconography, so he'd asked the Tattoo artist to give him a tattoo with the symbols crafted together.
At first, I then told him it was a notorious Boston gang symbol, which got the attention of the ladies at the bar. He immediately looked around and covered it up. Rolled the sleeve down...things got serious.
I then pulled the symbol up on my phone. And it was an identical match of the first jpeg that a google search offers.
Needless to say the "blood drained out of his face". He though he had an original design.
OK, it was mean. But I was ready to let is stay that way...
My wife then explained it was the Blood Angels symbol, and it was from a game.
The bar tender sighed relief.
He promised to look it up. The girls all went back to their other conversations.
LOL.
Tats.
You just never know who has them...
Monday, December 23, 2019
Wednesday, October 16, 2019
Seaside Italy 1943 - its like a trip to the Zoo
I'm looking to clear a bunch of pix off my phone. I had a great time in a team game of Bolt Action in Late September, and its all worth sharing.
We decided to play a 1500 point per side game (750 per player). I was teamed with another German player. This would be maybe the second time I'd rolled out the Germans from my collection for a bolt action game. I made the list on the fly using the Battlescribe tool. It was fun to put together a list built around the collection. It became a hodgepodge of sorts. My team mate had an awesome German army collection though, and we talked briefly to tailor our lists.
The allies (combined Americans and Brits) together really made it like Salerno, soon after the landings as the Allies pushed inland to hook up with the 82nd Airborne who had dropped in on the right flank of the landings. The terrain was really nice - the "club's" Italian table. Dusty open ground around a village crossroads.
Overall, the Germans won the day, and the fighting got close in and nasty at times.
Here...have a look...
THANKS FOR SOME OF THE PHOTOS I BORROWED FROM OTHER POSTINGS FROM THE DAY! YOU GUYS ROCK!
The captions are all mine...

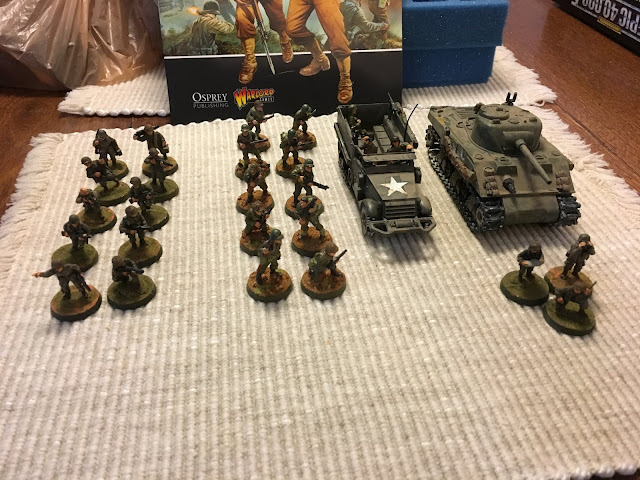
Here is my 750 points. Regular Tiger, Veteran Infantry. One squad is under strength in order to get the Tiger into the list. Regular MMG for support. Veteran officer.

Here is what the British Player was using for 750...his big secret sauce was the squad of Gurkhas. Really nasty in assault. Included in there is the artillery observer...

Bad shot of the Americans. Paratroopers and a Calliope Sherman, including a bazooka support team, other stuff.
Unfortunately I did not get a shot of the other German player's forces...

Battleground before deployment. The battle would be a swirling affair - 1/2 of the Allied force was to start, deployed on the table within 12-inches of the center. On Turn 1, half of the German units would enter from the left. After the first turn, all remaining units would come in from reserves, from any table edge, but not if it was an edge the last enemy unit entered from! This mechanic really made the game a cat-and mouse event.

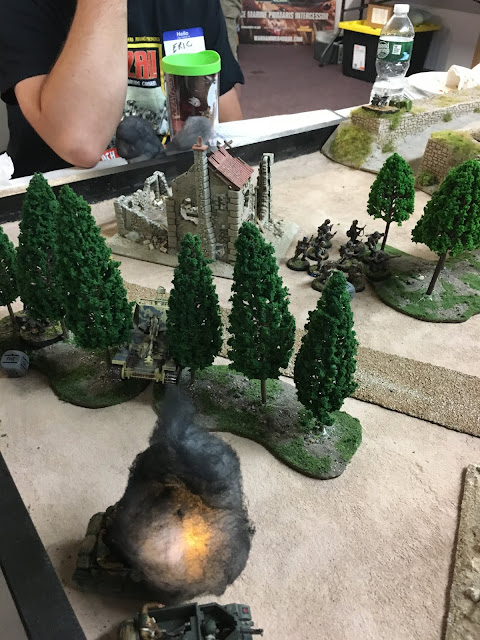
The game started with a bombardment, which put initial pin markers on the deployed allied units. Then the first dice drawn was for the Germans, and I used it to deploy the Tiger into view of most of the allied army. The fear was palpable!

The Tiger drove onto the road and headed towards the crossroads, its two MMGs spitting out fire on the various infantry units stuck out in the open. That hidden marker...LOL...

With the Tiger heading west towards the beach, the Sherman entered from the South. A few units later, the German Heer infantry entered behind the unguarded Sherman and...

Meanwhile, the Bren Carriers arrived in the Heer staging area...the Ghurka's charged out and in a tough fight wiped out a Heer squad and a HQ organizing the attack on the paras. The response was plain. German infantry counterattacked and slaughtered the Ghurkas, and the Bren Carriers (including the British artillery observer) were wiped out...most of the work by the Marder III...

Two or three activation dice later, the British attack was just wreckage.

And then, the Sherman was destroyed by the ol' shaped charge up the tailpipe trick...

With the Allied defenders no on the ropes, it was time to start wiping up...

The Tiger commander decides to just drive on through...the paras just rolled out of the way and let the parade go by...

Trundle Trundle Trundle...doodle dee doo...

More allied troops hiding in the rubble that is Italy...

Fighting spread further towards the west....

Soon after, the Heer units dealt with the Bazooka team, and the Allied players called for an all out retreat. The Germans had stopped the advance.
Overall, it was a bunch of fun.
A few things that had me scratching my head - like...
1. How hard it is to damage an infantry unit in a crater, that goes down...or even out in the open...
2. How charging a string of heavily pinned infantry units with a Tiger won't be successful if their nearby officer helps with morale...they just let the big tank roll on by...
I never used the 88mm Gun on the Tiger...I just kept using the MMGs. If the Sherman had been in my LOS, I would have gone for it.
At one point the American Bazooka team went for a long side shot, but they FUBAR'd their morale roll and shot their load at a nearby British squad instead...
Overall, if we'd spun the table around and my team had played the Allied side, we'd have started the game with the artillery spotter on the table with the Bren Carriers, keeping paras, Ghurkas, and Bazooka in reserves...certainly, units were going to get pinned in the barrage before the game started, but once the main point of the German attack was known (west to east in this case), we could have withdrawn to better cover and looked to take the two German tanks from the rear...the artillery observer for the Brits is a key resource. Our opponents never used theirs. I'd say my game play was sort of meh. The Tiger was not the MVP. It did impact the allies with extra Tiger Fear, but not much else. I was thinking about shooting up the units in the road at point blank range, but after shooting at them for two turns, with little effect but pins, I decided to try to charge through them for a lucky panic roll...again, no effect. The Tiger did, however, help wipe out another American squad that was troubling us far to the southwest. Maybe next time I'll break out the Panther...
Next game in a few weeks...I'll need to come up with a different list. My German collection really needs to be upgraded...
Tuesday, September 3, 2019
May 1942 - Near Kharkov - Bolt Action
This past Saturday was a "monthly" special event day for our local Bolt Action in Maine group. We had 5 or so separate tables set up - different terrain and players for each! Probably 16+ Bolt Action players in the house. Crossroad Games. The "escalation League" theme was 1942!
My own battle had a very fluid beginning. I'm not a "regular" so I had no idea what I'd be doing or even the points. I'd brought US infantry (1943 Tunisia, 1000 points), and also a 1942 German (750 pt) list. Ends up I was going to play 1942 Germans at 1000 points...I was using BattleScribe to pull the list together on the fly, so the points are suspected to be wrong, but close. I also used the models I have, not the models I wished I'd have. Plus, I'd never played Germans in Bolt Action before! I also had no idea what my opponent was bringing, much less what kid of mission I'd have.
My Battle would be against Russian, and I'll call it a platoon engagement around the Ukrainian village of Nepokrytaia, at the beginning of the 2nd Battle of Kharkov. The terrain was the village center - Russian Infantry units from the 160th Rifle Division were attacking through the village. My force was from the German 6th Army - this was pre-Stalingrad, after all (no particular Division).
The Scenario we rolled up was simple - destroy each other's local objective. The Russian infantry was attacking to destroy my local radio communications net, while I was out to destroy a forward supply dump.
My force (German Platoon, 1000 points):
10 Activation dice
Oberleutnant with two runners, SMGs, Veterans
Heer Veteran Infantry Squad, 10, rifles and LMG
Heer Veteran Infantry Squad, 10, rifles and LMG
Heer pioneer squad, 5, SMGs and LMG
MMG Team, veteran
MMG Team, veteran
Light Mortar team, veteran
50mm pak38 Team, veteran
Marder II inexperienced (note - I used a Wespe as counts-as)
Hanomag transport, forward and rear MMGs

The OPFOR (Russian Infantry, 1000 points - I don't have an official list)
Essentially 2 Platoons, about 18 activation dice.
2 HQs (both LT equivalents)
6+/- Infantry Squads - regular to inexperienced, 5+/- or so men in each, with flamethrowers or LMGs, rifles
1 infantry (free, conscript) squad - 12, rifles
1 Sniper team
1 Medium ATG/Howitzer
2 Multiple Rocket Trucks
+/- 4 AT Dog Teams, 2 handlers and 2 dogs each.
1 medium mortar team with spotter
Deployment
the game requires a 40-inch wide no-man's land up the middle, so we each had 4-inch wide deplyment strips. My "radio net" objective was placed on my far left. The Russian supply dump was set on the upper right. The terrain was a dense mix of wooden buildings and a church, central square bell tower, and a N-S road. I was on the north edge facing south.

Battle plan
My platoon would split into a defense force and an attacking force. I intended to send the Heer infantry squads, Hanomag, Marder up the center and left with overwatch from my light mortar, Pak38, and one MMG team. My own objective would be protected by the HQ, pioneers, and remaining MMG. The Russians deployed more or less into a similar attack and defense force. I was going to need to be careful - the Russian had a lot more activation dice than me, so it would create a huge tactical advantage for them! My biggest concern was the 40-inch distance my troops would need to travel just to be near the objective. I wanted to leap frog forward the best I could, with one Heer squad on foot and the other by Hanomag. To that tactical end, the Heer squad on foot would move through terrain for cover, flanking the Hanomag on the road.

Turn 1.
Everything started to go to south really fast. I realized that with the dense terrain, the MMG and light mortar were pretty useless, and so I moved them east to support my objective. Similarly, I decided to move the Marder east as well, so I'd have a lot more defensive firepower there. My opponent used the N-S road as a demarcation point, and with my Pak38 on ambush looking up the road, he just never looked to cross it. My Heer squad on foot immediately came under sniper fire while crossing the village cemetery. In the near center, the Hanomag (running up the road) was immediately attacked by two AT dog teams - which stunned the vehicle crew (I don't think we played it right on damage - possibly forgetting the 1+ for open topped) and added a bunch of pin markers to my attackers. On my right, all of the Russian infantry units rushed forward through the various buildings or fenced yards, but I was able to apply a few pin markers and casualties. The Russian mortar and one rocket truck fired, but both missed.


On the left flank, I moved the HQ and Pioneers forward, and immediately engaged the oncoming Russians with some MMG and Marder II support. The Russian rocket truck on that flank switched to smoke to obscure my supporting forces, leaving the pioneers and HQ to fight about three times their number, plus one or two flamethrowers. At one point I had my pioneers and HQ move up and shoot a 5-man russian squad at point blank range in the open. The Russians went down. With the equivalent of 7 SMG shots and 1 LMG, I was only able to cause two casualties - which was really bad considering that enemy squad had a flamethrower. Needless to say, on turn 3 my pioneers were roasted through two flamethrower attacks, and my HQ squad was shot up and then assaulted. That left the path to my objective basically open. Adding insult to injury, another set of AT dog teams wrecked the Marder II.


Turn 5
With smoke obscuring my remaining support elements, and my attack force eliminated through a combination of shooting and rocket/mortar fire, we called the game as a Russian Victory. We ended with my having on-board just the 2 MMG teams and the light mortar team.


Lessons learned
This is probably my first real loss in Bolt Action besides the first game I'd ever played. Usually Id get a draw or narrow win.
The battle reinforced my opinion that flamethrowers and AT dogs are amazingly dangerous. For this game, the light mortar was a waste of points. Since it has no spotter, its just bad in dense terrain. The Pak38 looks awesome - I'd bought it or won it pre-painted a decade ago and had never used it in a game. My opponent was more afraid of it than I was...The Marder II was good - I'd shot it into some buildings and such, but it really needed to stay back from the dogs. Overall, my game suffered a bit from my deployment. I might have easily deployed the same and then just rushed left on all defense for a draw. Also - this is the second time I've seen the Katusha rocket truck in a game, and the guys that have them are getting tactically better with them - in a nutshell, deploy a large amount of smoke (3 large templates of smoke) with nearly no risk, OR it a target and every unit within 6 inches of that target on a 6+ roll. In the artillery role they can miss a lot, but when you get one hit, it is pretty devastating for each 6+.
In departing, I bought a Bolt Action German Heer medium mortar kit. I'll need to have that in my quiver for the next time.
The Hanomag btw is a Solido 1/50 scale die cast model from their "motor pool" collection. The Wespe is a similar scale plastic model from Bandai. In my rush to get a list built, I had not realized my Hetzer is a pz38(t), lol, I might have taken that instead of the counts-as Marder II. Regardless, since I used it, I now need to get a Marder II for the collection...
And a big thanks to some of you who "donated" their photos to my story line above! You know who you are!
If I'm playing as a German in September's monthly event, I'll have to upgrade to a 1943 list...I am inspired to do some painting and basing repairs and upgrades...
Until next time!
MING
This past Saturday was a "monthly" special event day for our local Bolt Action in Maine group. We had 5 or so separate tables set up - different terrain and players for each! Probably 16+ Bolt Action players in the house. Crossroad Games. The "escalation League" theme was 1942!
My own battle had a very fluid beginning. I'm not a "regular" so I had no idea what I'd be doing or even the points. I'd brought US infantry (1943 Tunisia, 1000 points), and also a 1942 German (750 pt) list. Ends up I was going to play 1942 Germans at 1000 points...I was using BattleScribe to pull the list together on the fly, so the points are suspected to be wrong, but close. I also used the models I have, not the models I wished I'd have. Plus, I'd never played Germans in Bolt Action before! I also had no idea what my opponent was bringing, much less what kid of mission I'd have.
My Battle would be against Russian, and I'll call it a platoon engagement around the Ukrainian village of Nepokrytaia, at the beginning of the 2nd Battle of Kharkov. The terrain was the village center - Russian Infantry units from the 160th Rifle Division were attacking through the village. My force was from the German 6th Army - this was pre-Stalingrad, after all (no particular Division).
The Scenario we rolled up was simple - destroy each other's local objective. The Russian infantry was attacking to destroy my local radio communications net, while I was out to destroy a forward supply dump.
My force (German Platoon, 1000 points):
10 Activation dice
Oberleutnant with two runners, SMGs, Veterans
Heer Veteran Infantry Squad, 10, rifles and LMG
Heer Veteran Infantry Squad, 10, rifles and LMG
Heer pioneer squad, 5, SMGs and LMG
MMG Team, veteran
MMG Team, veteran
Light Mortar team, veteran
50mm pak38 Team, veteran
Marder II inexperienced (note - I used a Wespe as counts-as)
Hanomag transport, forward and rear MMGs

My force - the radioman in the sandbagged position is the OPFOR objective.
Essentially 2 Platoons, about 18 activation dice.
2 HQs (both LT equivalents)
6+/- Infantry Squads - regular to inexperienced, 5+/- or so men in each, with flamethrowers or LMGs, rifles
1 infantry (free, conscript) squad - 12, rifles
1 Sniper team
1 Medium ATG/Howitzer
2 Multiple Rocket Trucks
+/- 4 AT Dog Teams, 2 handlers and 2 dogs each.
1 medium mortar team with spotter
Deployment
the game requires a 40-inch wide no-man's land up the middle, so we each had 4-inch wide deplyment strips. My "radio net" objective was placed on my far left. The Russian supply dump was set on the upper right. The terrain was a dense mix of wooden buildings and a church, central square bell tower, and a N-S road. I was on the north edge facing south.

Table looking west. I'd be attacking north to south-southwest, defending my objective in the northeast.
Battle plan
My platoon would split into a defense force and an attacking force. I intended to send the Heer infantry squads, Hanomag, Marder up the center and left with overwatch from my light mortar, Pak38, and one MMG team. My own objective would be protected by the HQ, pioneers, and remaining MMG. The Russians deployed more or less into a similar attack and defense force. I was going to need to be careful - the Russian had a lot more activation dice than me, so it would create a huge tactical advantage for them! My biggest concern was the 40-inch distance my troops would need to travel just to be near the objective. I wanted to leap frog forward the best I could, with one Heer squad on foot and the other by Hanomag. To that tactical end, the Heer squad on foot would move through terrain for cover, flanking the Hanomag on the road.

Deployment complete. Ready to go! Wespe playing the role of a Marder II.
Turn 1.
Everything started to go to south really fast. I realized that with the dense terrain, the MMG and light mortar were pretty useless, and so I moved them east to support my objective. Similarly, I decided to move the Marder east as well, so I'd have a lot more defensive firepower there. My opponent used the N-S road as a demarcation point, and with my Pak38 on ambush looking up the road, he just never looked to cross it. My Heer squad on foot immediately came under sniper fire while crossing the village cemetery. In the near center, the Hanomag (running up the road) was immediately attacked by two AT dog teams - which stunned the vehicle crew (I don't think we played it right on damage - possibly forgetting the 1+ for open topped) and added a bunch of pin markers to my attackers. On my right, all of the Russian infantry units rushed forward through the various buildings or fenced yards, but I was able to apply a few pin markers and casualties. The Russian mortar and one rocket truck fired, but both missed.

Turn 1. Pak38 has been targeted and missed by the mortar. I had to dig the crew out of a box during a break. Apparently they were in my car hanging out with the Americans...

Hey, use that radio. What? We can't get any artillery or air support till the next game?

Go ahead. Cross the road...make my day...

Who is a happy dog? Good boy!
Turns 2 through 4
My attackers were immediately bogged down. The Russians attacked the Hanomag squad with a second wave of dogs, first immobilizing it for more pins, then wrecking it. The Heer infantry dismounted with about 5 pins on the squad, and went down on their own activation. The Heer squad in the cemetery encountered the same - one rocket found them for a mess of casualties and pin markers. Both squads made no progress. The russian mortar team continued to miss the Pak38, and no Russians wanted to be ambushed by it.On the left flank, I moved the HQ and Pioneers forward, and immediately engaged the oncoming Russians with some MMG and Marder II support. The Russian rocket truck on that flank switched to smoke to obscure my supporting forces, leaving the pioneers and HQ to fight about three times their number, plus one or two flamethrowers. At one point I had my pioneers and HQ move up and shoot a 5-man russian squad at point blank range in the open. The Russians went down. With the equivalent of 7 SMG shots and 1 LMG, I was only able to cause two casualties - which was really bad considering that enemy squad had a flamethrower. Needless to say, on turn 3 my pioneers were roasted through two flamethrower attacks, and my HQ squad was shot up and then assaulted. That left the path to my objective basically open. Adding insult to injury, another set of AT dog teams wrecked the Marder II.

Redeploying to the east...

Advance in the center stalling...most Russian units are inside buildings now...

He's not here to pee on my Hanomag...

Back from lunch break...no Russian Armor in sight...

Gaining the midline of the table - looking to stall the Russians there.

Viewpoint from the other side of the building...

meanwhile, the attacking force is stalled in the village center.

Smoke from the rockets are obscuring the support element.
With smoke obscuring my remaining support elements, and my attack force eliminated through a combination of shooting and rocket/mortar fire, we called the game as a Russian Victory. We ended with my having on-board just the 2 MMG teams and the light mortar team.

Russians are rapidly advancing towards their objective now.

The last canoneer at the Pak38 looks on at the rushing conscripts.
Lessons learned
This is probably my first real loss in Bolt Action besides the first game I'd ever played. Usually Id get a draw or narrow win.
The battle reinforced my opinion that flamethrowers and AT dogs are amazingly dangerous. For this game, the light mortar was a waste of points. Since it has no spotter, its just bad in dense terrain. The Pak38 looks awesome - I'd bought it or won it pre-painted a decade ago and had never used it in a game. My opponent was more afraid of it than I was...The Marder II was good - I'd shot it into some buildings and such, but it really needed to stay back from the dogs. Overall, my game suffered a bit from my deployment. I might have easily deployed the same and then just rushed left on all defense for a draw. Also - this is the second time I've seen the Katusha rocket truck in a game, and the guys that have them are getting tactically better with them - in a nutshell, deploy a large amount of smoke (3 large templates of smoke) with nearly no risk, OR it a target and every unit within 6 inches of that target on a 6+ roll. In the artillery role they can miss a lot, but when you get one hit, it is pretty devastating for each 6+.
In departing, I bought a Bolt Action German Heer medium mortar kit. I'll need to have that in my quiver for the next time.
The Hanomag btw is a Solido 1/50 scale die cast model from their "motor pool" collection. The Wespe is a similar scale plastic model from Bandai. In my rush to get a list built, I had not realized my Hetzer is a pz38(t), lol, I might have taken that instead of the counts-as Marder II. Regardless, since I used it, I now need to get a Marder II for the collection...
And a big thanks to some of you who "donated" their photos to my story line above! You know who you are!
If I'm playing as a German in September's monthly event, I'll have to upgrade to a 1943 list...I am inspired to do some painting and basing repairs and upgrades...
Until next time!
MING
Thursday, August 29, 2019
D+1 Attack - Widening the Utah beach Landing Zone - Bolt Action Game
Ed: I'm not afraid to edit what was happening...this is my battle report for what was going on for the D-Day event at Crossroad Games this past weekend (the store's 20th Anniversary!). The single 24-foot table (corridor) battlefield was for 8 players per side. The organizers were calling it Beach-Carentan-Caen (just to make the one British player happy I guess). Since the allied (almost entirely US) force was fighting to gain ground facing the west, I'm saying instead it was (at this scale) the western-most expanse for Utah Beach, D+1, from north to south as Quineville - Montebourg - Valognes (all connected by the local roads). It fits well, since Montebourg had a church tower that could be seen from Utah Beach by Roosevelt when his 4th ID landed.
The game play was awesome. Each player provided a 750 point list, following the Normandy selector. The head judge assigned tables more or less on arrival, so each approx. 6-foot zone had two players per zone. The equivalent of about 8 depleted platoons per side. There was no further "historical" guidance on force selection. The game started with 8 dice per side, and each table acted on that activation.
I'd assumed in my planning a few days before that I'd be fighting in hedgerows or a village, so I had a mixed force of paratroopers from the 502nd PIR just reinforced with some mechanized support (4th ID just off the beach) to take on my mission. At the last minute, however, my mission was changed to bunker clearing along the beach as the landing was widened westward towards Cherbourg and the Cotentin Peninsula. For this, my platoon was joined by another combined team of US Rangers and more infantry from the 4th ID. Neither my platoon or the supporting platoon was ideal for this job, but we talked out our attack and made the best of it.
My List:
502nd PIR -
Paratrooper Platoon HQ - 1st Lieutenant and two runners, all with submachine guns.
Paratrooper Squad, 10, rifles, 1 LMG team.
4th ID -
Veteran Infantry Squad, 10, rifles, 1 BAR team
Regular M3 halftrack, pintle HMG, rearward MMG
Veteran M4 Sherman, Coaxial mmg, hull mmg, wet storage.
My support buddy's list:
Rangers:
Ranger Squad, 10, SMGs and rifles, cliff climbers
Ranger Squad, 10, SMGs and rifles, cliff climbers
4th ID
Regular Infantry HQ, 2nd Lieutenant and runner
Regular Infantry Squad, 10, rifles
Bazooka Team
Mortar Team
Scenario
As a special rule for the event, the german players could deploy up to half of their units (per player) on the table, at any location, and the remainder would enter following reinforcement rules turn 2 onward. The Allied players would enter any units they want turn 1 using a run or advance order. We had to deploy on the assigned table, but, you could support the adjoining table if needed.
There were 4 bunkers on our beach front. We were tasked to take them. Our table had the simple win condition of 1 point per bunker. Side with the most bunker points wins. Other tables had their own different win conditions. All of the win conditions favored the defender.

Deployment
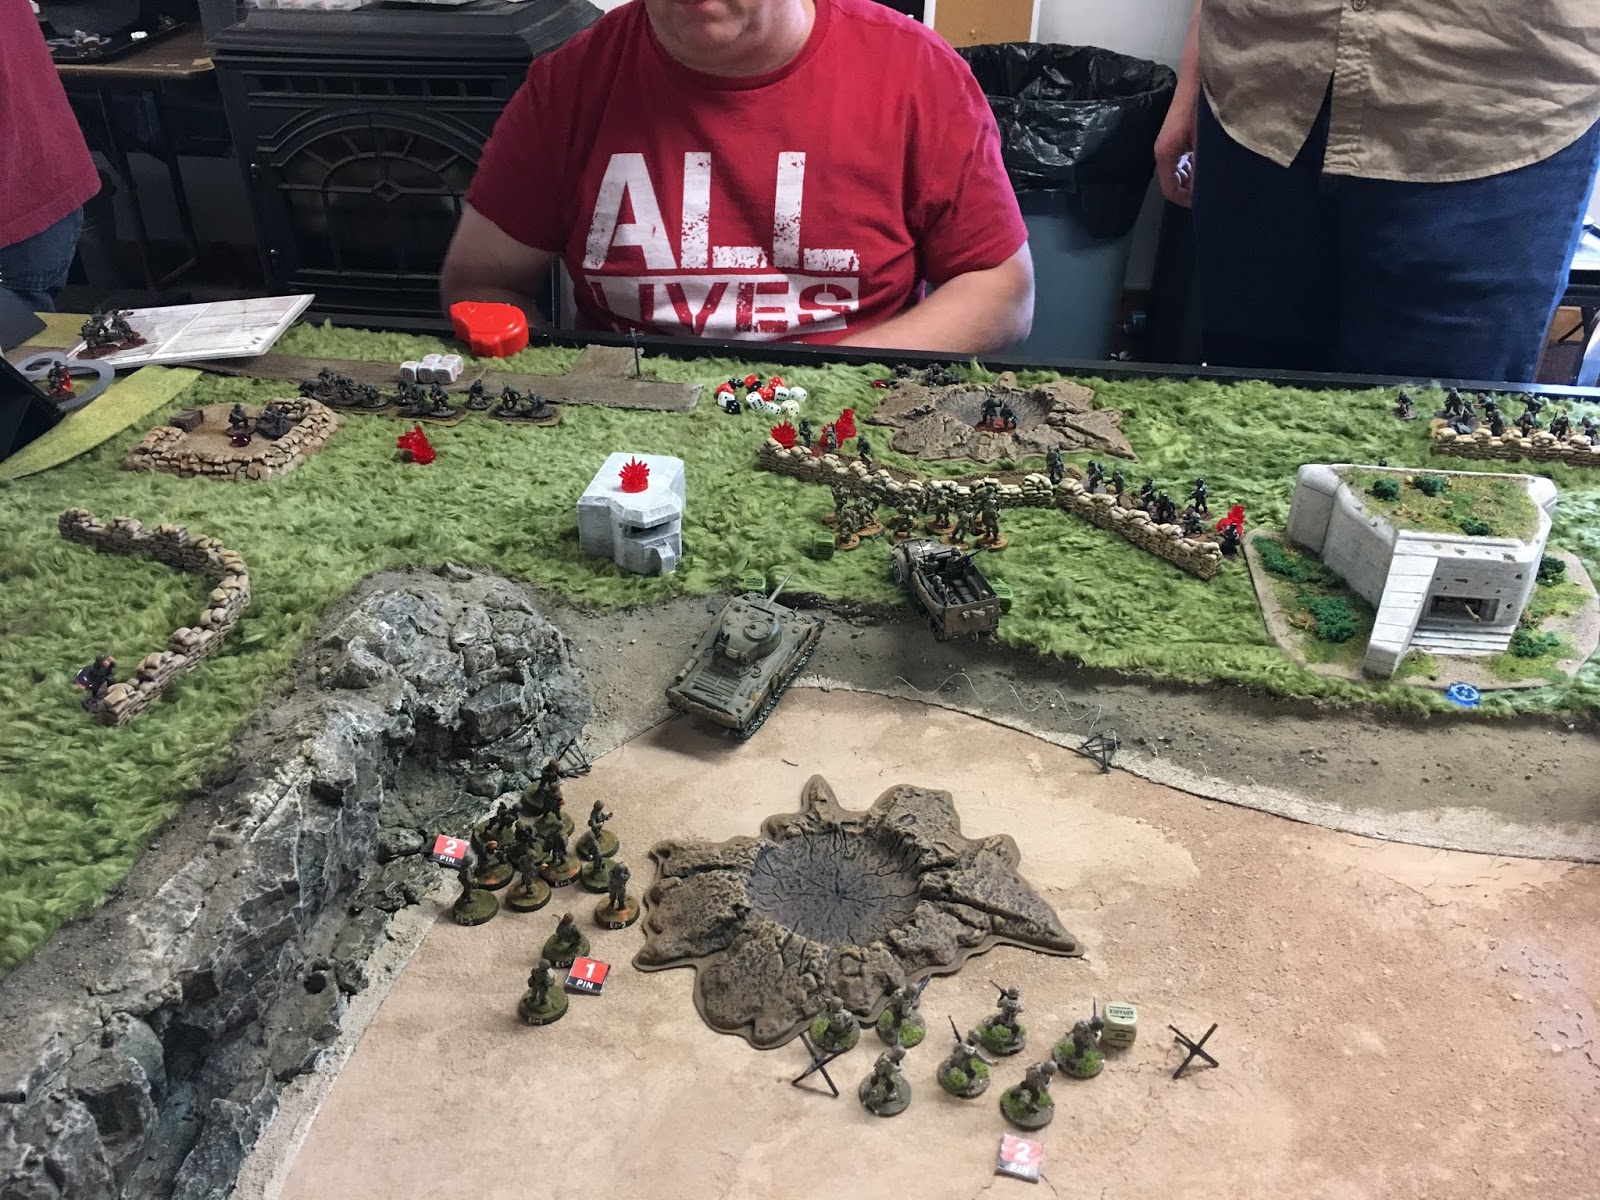
My team partner and I watched the germans deploy and studied the terrain. A pak40 ATG and an 88mm ATG were deployed in bunkers, as were two MMGs. Mortars were deployed with spotters in trenches further back. We realized that due to the layout, there was a blind spot in the terrain through which we could advance to largely mitigate the ATGs (right below the cliff at the eastern end of the beach). We'd still be susceptible to other fire, but not those weapons! Our plan was for the rangers to enter and take the bunker on the high ground immediately to our left, and all other squads to advance rapidly behind the tank and half track to gain the access to the next two bunkers in line. Regardless, the bunkers were 3 feet into the table, so even with just running it would take 3 turns to get to most of them, plus you could only assault the bunkers from the rear doors...
The game started with a preparatory bombardment that placed a few pin markers on the enemy but little else.

Game Turns
On turn 1, we started with a good run of allied activations. The Sherman Tank and Halftrack full of veterans ran up the base of the cliff followed by the paratroopers. The rangers came next, immediately taking two actions to enter and scale the cliff. They were all followed by the regular infantry - which in the fog and confusion of war decided to flank the attacking force, straying into the line of sight of german guns and artillery/mortar spotters! One ranger squad had climbed directly into the face of the 88 gun, and took a danger close blast in the face.


On turn 2, the dice began with the arrival of a german artillery barrage (16 inches in diameter) which dropped a big pile of pin markers all over the assault force and a few casualties. Our assault force continued to run directly at the two bunkers ahead (#2 and #3), while the rangers began work on securing bunker 1.Several german reinforcement units began arriving and they ran towards the edge of the beach to take positions in their trench line.

On turn 3, our mortar team began dropping smoke to obscure the pak40 bunker. The Sherman and halftrack began suppressing the german troops in a trench line just uphill from the beach. Bunker 1 was secured through assault. The german MMG team in bunker 4 abandoned their post and began running south (left) to try to get into a useful position.

Turn 4, we received some assistance in the form of an infantry squad from the inland assault on Montebourg firing on germans in the trenchline behind bunker #2.The Sherman stopped at the beach edge to take up a better firing position on the trench line - and staying beyond reach of the panzerfausts! The half track advanced into the trench line area and the veteran infantry dismounted to decimate a german squad there. They were met with withering return fire from other german units which eliminated the squad. The paratrooper squad was set to assault Bunker 2, but was met with fierce fire from bunker 2, forcing them down (pinned!). German units from the north end of the beach all began streaming south (left), but more smoke shells from the mortar team obstructed their view to the beach.


Turn 5, with 5 pin markers, the paratroopers passed their leadership and assaulted and took bunker 2. In response, entrenched german gunners began shooting them up. One german squad assaulted the nearby paratrooper HQ unit, and lost! The HQ unit then assaulted the next german unit in the line and won again. Then they were shot up and eliminated from the fight. The untouched Sherman continued using just MMG fire to suppress and pin german units, focusing on anything with an anti-tank capability.

On turn 6, we wrapped up the assault, keeping the germans pinned around bunker #3, but we were unable to reach it.
The judge ruled the attack to be a draw or stalemate.
Far and away inland, the battles also pitched back and forth. The overall victory for the side was seen as a slight (minor) german victory (minor german at Montebourg, minor allied in the hedgerows, and minor german at Valognes). The germans still held the two towns, but lost in the terrain between.
In the Montebourg section, an allied win was only achievable by capturing the church and holding it. It was in the middle of a town square. Nearly impossible. An allied player almost did it though by assaulting through the front door on turn 6...it was that close...
Overall, awesome effort by all!
The best learning moment for me was how mortars can be used to deploy smoke. Never though of that in previous games. ALSO as a house rule for smoke - rather than having smoke shells deviate up to 12 inches on a miss to a point selected by the defender, we went with random direction, 2D6 for initial smoke placement. It was terrific, and worked great for a team game. I also read up on using tanks to assault infantry. I considered doing it on Turns 5 and 6, but decided to just keep firing...
I'd consider my 750 point list to be great for this game. If we went with slightly bigger lists I'd try to squeeze a mortar in for the smoke...or a FOB to call in a barrage or air strike...or flamethrowers....
There is another bolt action day this weekend! Hoping to get another game in!
All for now,
MING
The game play was awesome. Each player provided a 750 point list, following the Normandy selector. The head judge assigned tables more or less on arrival, so each approx. 6-foot zone had two players per zone. The equivalent of about 8 depleted platoons per side. There was no further "historical" guidance on force selection. The game started with 8 dice per side, and each table acted on that activation.
I'd assumed in my planning a few days before that I'd be fighting in hedgerows or a village, so I had a mixed force of paratroopers from the 502nd PIR just reinforced with some mechanized support (4th ID just off the beach) to take on my mission. At the last minute, however, my mission was changed to bunker clearing along the beach as the landing was widened westward towards Cherbourg and the Cotentin Peninsula. For this, my platoon was joined by another combined team of US Rangers and more infantry from the 4th ID. Neither my platoon or the supporting platoon was ideal for this job, but we talked out our attack and made the best of it.
My List:
502nd PIR -
Paratrooper Platoon HQ - 1st Lieutenant and two runners, all with submachine guns.
Paratrooper Squad, 10, rifles, 1 LMG team.
4th ID -
Veteran Infantry Squad, 10, rifles, 1 BAR team
Regular M3 halftrack, pintle HMG, rearward MMG
Veteran M4 Sherman, Coaxial mmg, hull mmg, wet storage.

My force, ready to go.
My support buddy's list:
Rangers:
Ranger Squad, 10, SMGs and rifles, cliff climbers
Ranger Squad, 10, SMGs and rifles, cliff climbers
4th ID
Regular Infantry HQ, 2nd Lieutenant and runner
Regular Infantry Squad, 10, rifles
Bazooka Team
Mortar Team
Scenario
As a special rule for the event, the german players could deploy up to half of their units (per player) on the table, at any location, and the remainder would enter following reinforcement rules turn 2 onward. The Allied players would enter any units they want turn 1 using a run or advance order. We had to deploy on the assigned table, but, you could support the adjoining table if needed.
There were 4 bunkers on our beach front. We were tasked to take them. Our table had the simple win condition of 1 point per bunker. Side with the most bunker points wins. Other tables had their own different win conditions. All of the win conditions favored the defender.

Beach with the cliff at the south end. Montebourg in the distance.
Deployment
My team partner and I watched the germans deploy and studied the terrain. A pak40 ATG and an 88mm ATG were deployed in bunkers, as were two MMGs. Mortars were deployed with spotters in trenches further back. We realized that due to the layout, there was a blind spot in the terrain through which we could advance to largely mitigate the ATGs (right below the cliff at the eastern end of the beach). We'd still be susceptible to other fire, but not those weapons! Our plan was for the rangers to enter and take the bunker on the high ground immediately to our left, and all other squads to advance rapidly behind the tank and half track to gain the access to the next two bunkers in line. Regardless, the bunkers were 3 feet into the table, so even with just running it would take 3 turns to get to most of them, plus you could only assault the bunkers from the rear doors...
The game started with a preparatory bombardment that placed a few pin markers on the enemy but little else.

View after the bombardment - pins here and there.
On turn 1, we started with a good run of allied activations. The Sherman Tank and Halftrack full of veterans ran up the base of the cliff followed by the paratroopers. The rangers came next, immediately taking two actions to enter and scale the cliff. They were all followed by the regular infantry - which in the fog and confusion of war decided to flank the attacking force, straying into the line of sight of german guns and artillery/mortar spotters! One ranger squad had climbed directly into the face of the 88 gun, and took a danger close blast in the face.

Units beginning the attack! That regular infantry squad should have stayed in cover!

Rangers scaling the cliff see the gun barrel crank towards them!
On turn 2, the dice began with the arrival of a german artillery barrage (16 inches in diameter) which dropped a big pile of pin markers all over the assault force and a few casualties. Our assault force continued to run directly at the two bunkers ahead (#2 and #3), while the rangers began work on securing bunker 1.Several german reinforcement units began arriving and they ran towards the edge of the beach to take positions in their trench line.

German reinforcements start arriving and man their trench line! Rangers have made quick work of Bunker #1 and I'm stalled in front of Bunker #2.
On turn 3, our mortar team began dropping smoke to obscure the pak40 bunker. The Sherman and halftrack began suppressing the german troops in a trench line just uphill from the beach. Bunker 1 was secured through assault. The german MMG team in bunker 4 abandoned their post and began running south (left) to try to get into a useful position.
Paratroopers are pinned by bunker #2, while the veterans of the 4th ID carry their attack to the trenches only to be wiped out by a crossfire! Where did the rangers go?
Turn 4, we received some assistance in the form of an infantry squad from the inland assault on Montebourg firing on germans in the trenchline behind bunker #2.The Sherman stopped at the beach edge to take up a better firing position on the trench line - and staying beyond reach of the panzerfausts! The half track advanced into the trench line area and the veteran infantry dismounted to decimate a german squad there. They were met with withering return fire from other german units which eliminated the squad. The paratrooper squad was set to assault Bunker 2, but was met with fierce fire from bunker 2, forcing them down (pinned!). German units from the north end of the beach all began streaming south (left), but more smoke shells from the mortar team obstructed their view to the beach.

Firing into the trench line! The infantry will fail to get to Bunker #3...

Smoke is helping, We have cleared Bunker #2, but Bunker #3 is being reinforced and the germans have abandoned Bunker #4. The halftrack has pulled forward to clear the LOS for the Sherman.
Turn 5, with 5 pin markers, the paratroopers passed their leadership and assaulted and took bunker 2. In response, entrenched german gunners began shooting them up. One german squad assaulted the nearby paratrooper HQ unit, and lost! The HQ unit then assaulted the next german unit in the line and won again. Then they were shot up and eliminated from the fight. The untouched Sherman continued using just MMG fire to suppress and pin german units, focusing on anything with an anti-tank capability.

Rangers on the top of the dcliff have a sweeping view of the dwindling germans on our flank! Remnants of the paratrooper squad take cover at bunker #2.
On turn 6, we wrapped up the assault, keeping the germans pinned around bunker #3, but we were unable to reach it.
Far and away inland, the battles also pitched back and forth. The overall victory for the side was seen as a slight (minor) german victory (minor german at Montebourg, minor allied in the hedgerows, and minor german at Valognes). The germans still held the two towns, but lost in the terrain between.
In the Montebourg section, an allied win was only achievable by capturing the church and holding it. It was in the middle of a town square. Nearly impossible. An allied player almost did it though by assaulting through the front door on turn 6...it was that close...
Overall, awesome effort by all!
The best learning moment for me was how mortars can be used to deploy smoke. Never though of that in previous games. ALSO as a house rule for smoke - rather than having smoke shells deviate up to 12 inches on a miss to a point selected by the defender, we went with random direction, 2D6 for initial smoke placement. It was terrific, and worked great for a team game. I also read up on using tanks to assault infantry. I considered doing it on Turns 5 and 6, but decided to just keep firing...
I'd consider my 750 point list to be great for this game. If we went with slightly bigger lists I'd try to squeeze a mortar in for the smoke...or a FOB to call in a barrage or air strike...or flamethrowers....
There is another bolt action day this weekend! Hoping to get another game in!
All for now,
MING
Monday, August 19, 2019
Yep, my worst gaming year is done
I've been tracking my 40K performance now for 9 years. And yep, this was my worst year. The number of games were down. The number of wins way down. Just terrible. Blue or red, everything dead.
The blog pundits could have predicted it. Blood Angels and Ultramarines have been less than ideal in the 8th Edition format.
My games and battle reports showed it. I could hold my own or be looking for a win through three turns, and then bleed away any victory for the remainder of the game. Several close finishes. Just not enough staying power. Usually I'd get into some basic stats and things to evaluate causality and such for my annual performance review. I'm not going to do that this year.
Now, to the future!
Its almost like GW was waiting for me to finish the year!
I have already acquired the NEW space marine codex, NEW Ultramarines supplement, and NEW Ultramarines cards.
Maybe the winds are blowing for a change, and starting soon the new gaming year will charge off for better outcomes?
I've already been playing Ultramarines per their Chapter special rules (+1 Ld, able to leave combat and shoot at -1 to hit). But now look at all of the other stuff coming! +1 A on the assault. Doctrines. Some points adjustments. Chaplains! All sorts of things that make all Space marines far deadlier.
Imagine how the existing last Calgar list from my previous posts might work now?
It will be pretty interesting.
If my opponents would just keep playing their existing favorite factions and lists...
All for now,
MING
Wednesday, August 7, 2019
It has begin - Finally - Oh Wait?
I'm laughing and shaking my head simultaneously.
Ironically, I finally went to my local Warhammer store rather than my FLGS to purposefully purchase the Roboute Guilliman - Primarch of the Ultramarines model. I did this because they had the kit ready for a quick purchase, and I was in the area for a quick dinner and meeting.
The model was originally released a few years ago, and I just never bothered. I figured I could do well with my favored Ultramarines with a simple captain or Chapter Master Marneus Calgar (whom I'd purchased with his Victrix Honor Guard a few months ago). Frankly, since I think I've only seen the model twice - I thought it would be bigger! Big "Bobby G" is actually fairly small, and in reality, as my favorite painter to watch from "the Long War" has said - it is detail overload.
Last year I thought about purchasing the model and sending it out to be pro-painted.
I'm painting this one myself.
In watching some videos, there were three that stood out on w to do it, and all were worthy as an approach, or strategy, to get it done.
1. GW's thin your paint guy - he recommended assembling the model and then painting the whole model gold, using washes and highlights for the gold, then going back to paint in the blue armor and then final details and washes, etc. There are great applications for this approach that would extend to Black legion models too.
2. TLW's painter - he painted the model in parts, but started overall with air brushing and highlighting the blue armor first, then going back and painting the golds, then all of the other details. Then assembly.
3. Some nameless guy from the UK - he recommended assembly, priming and painting the model blue, and then using metallic sharpie brand MARKERS to do all the gold trim and silver metal highlights. Yes, permanent magic markers are available for bronze, silver, and gold.
Of course, the model itself comes with its own painting guide requiring about 20 different colors and washes...
My approach is a hybrid. I assembled the model, backpack, and base, and then primed them separately. Painted the gold and washed it. Now I'm on to the blue phase with a tiny brush and thin paint. Backpack is done, and I'm a third doe on the main body. Next will be gold touch-ups, then all the other details. I'm painting the detailed base separately, and will use some colors to tie in to my other existing Ultramarines. The most fun might be the dead Chaos Marine stomped in to the base. Assembly onto the base will be last. One thing I found with the base is that it had two flaming torches set on thin plastic poles. I'm going to replace the poles with metal rod - the poles are so fragile they did not last the priming stage. I'm not going to use markers though...just brush work...
Overall, I expect OK results. Not painting award quality, but OK. Overall, I'm looking forward to getting it done!
NOW, to make things interesting, of course, is this week's notice from GW on the release of a new Space Marine Codex, Cards, and Ultramarines Supplement! WOW! But what does that mean for list building? All I can say is that I'm happy I did not make other purchases yet! Will Bobby G go up in points? Will regular old scouts and tactical marines be absent from the new books? How deep will I need to dig in my pockets as I upgrade my marines to the modern era? I don't know, but it means I still have a few weeks to meet my goal of an updated list by month's end...
Leave a comment on the Chaos Marine Chapter to be the victim on Bobby G's base and I'll take it as your vote. I was thinking Nurgle (commonly encountered in my local meta), but....
All for now,
MING
See - you scrolled to the end...as a reward, here are two shots of Ultramarines from a friend's miniatures display cabinet...dang....I might need to get a glass case next...of course, they are all second company...and very nice....


Friday, August 2, 2019
Here it is - no more delays!
It's finally time I got around to this! It's my wrap up of the July Rockport Invitational!
1500 Points - Narrative Team Event
Synopsis: The Imperium vs Everyone Else - 9 tables each with their own city-fight based scenario, 3 rounds, attackers and defenders! Team Captains determined the parings for each table. I was on the Imperium side...we lost but narrowly. Terrain was awesome, the food was awesome, the beer was awesome, it was a great day and I thank the host for putting it on!
Here are some army tray shots (just part of the 18 competitors):


My List: (1500 pts, 11 CP)
Battalion Detachment
Marneus Calgar, Warlord, Ultramarines, Adept of the Codex
Chaplain in Terminator Armor
Infiltrator Squad (5)
Infiltrator Squad (5)
Scouts (5) w/ Camo Cloaks, 4 Sniper Rifles, 1 Heavy bolter
Terminator Squad (5), 1 Cyclone Missile launcher, homer
Venerable Dreadnought, TLLC, HF, DCCF
Landspeeder, HB/TML
Suppressor Squad (3)
Spearhead Detachment
Lieutenant in Phobos Armor
Eliminator Squad (3)
Whirlwind (Castellan launcher)
Whirlwind (Castellan Launcher)
The list has a few multi-purpose functions. The major ones are -
(1) As Ultramarines, everything is +1LD, and can withdraw and shoot at -1.
(2) Calgar was the focus of a firebase, giving rerolls to hit. This fire base would normally consist of the Venerable, and two whirlwinds and Landspeeder. His warlord trait helps to reclaim CPs.
(3) Snipers would take advantage of hellfire rounds on the HB to create more mortal wounds.
(4) Lieutenant, Terminators, and Chaplain created a deep strike reaction force.
(5) Snipers and Infiltrators could deploy forward to create early game board control.
The Games
Overall, I feel like I failed. The list always started strong, but failed around turn 5. Here is a run down of my games and pairings - plus or minus remembered details...
Game 1. Slay the Warlord. I was the defender, and had to deploy my warlord and a few other units in the table center - in this case a four floor ruin and bunker/trenhline. My opponent would deploy around the table edges. My units that were destroyed could become a never ending tide. My other units could enter from a table edge. If my Warlord died, the opponent won. No other primary win conditions. My random secondary was to have a single unit pass three morale checks. My opponent - Genestealer Cult! Needless to say, Calgar died in the ruins around Turn 3, and the unit I hoped to take 3 morale checks also died. My opponent won.
Overall, and I passed this on to the team leader - was that Calgar should have started the game on the top level of the ruin...it might have helped! On turn 1, I was totally surrounded by Blips...no place to run. In reality, it was pretty close. Huge GSC casualties. Very fun game. However, rock saws, GSC deep strikes within 9-inches, etc., and horrible eliminator dice rolls were all were painful. At the end of the game I had zero points for my team.


Game 2. Don't Kill the Troops. I think I was the attacker this time. Table quarters deployment. Primary scoring was killing for points: +3 for warlord, +2 for all other units except troops, -1 (yes minus) for killing troop choices. My randomly selected secondary was something I could not get, like "kill a flyer". My opponent was Tyranids. He had a Warlord, 2 other HQs, one Elite, and 6 troop choices. Probably 94 bug models.
At the end of the game, I had zero points for my team. My opponent only had a wounded warlord off in the far far table corner, I still had Calgar and a few other units. I'd lost like a score of 8-0. This game was just a tremendously bad pairing. But I'd killed 93 bugs in the process. Had to. They were all over me. Actual loss score was probably 8-0.

Game 3. Keep the Loot. In this game there were about 6 objectives, and you scored points at the end of each battle round (after the first) for the number of objectives you held. We had table quarter deployments again. In this case, my infiltrators and eliminators and scouts captured objectives during deployment - so I started the game with 4 out of 6.
My opponent was Orks! They had two or so truk-borne boyz mobs, two or three grot mobs, commandos, Zaggstruck, jumping boyz, meganobz with a truk, weirdboy, and relic shock attack gun, warboss on bike, mechboy on bike, something like 90 models (again).
I started off with more objectives, but I started to lose two of them pretty quick. One objective got cleared of eliminators, captured by orks, recaptured by the landspeeder, recaptured by orks, cleared of orks...in the end I'd lost again, but might have scored my secondary for my team. Final score was probably 5-3. Giant ork dead pile.


In Closing....
Overall, in looking at the list, the Chaplain just did not deliver, and the new eliminators were a disappointment. Since then I saw a eliminators tactica video which recommended just using the frag rounds...
My MVPs were the Whirlwinds and Terminators and Calgar and Landspeeder. 1500 points is a difficult spot for list building...If I do it again I'll use three Whirlwinds...I love the fact they can hit the entire table.
Since then, I've played a game using the 2000 point list from earlier this summer, but had to swap in a replacement for the regular dreadnought. Overall, I slaughtered the Nurgle opponent's units but fell short again towards the end...I'm peaking mid game...
Feedback on my list variants is to drop the Chaplain. 100+ points for a storm bolter 2+/4++ dude who is mediocre in close combat it just too bad. He does provide a CC benefit, but fails his ncharges half the time. The new concept is to replace him with a jump-pack captain with a hammer...similar number of shots, but far better in CC and still provides a reroll bubble. The other concept is to consider replacing the phobos lieutenant (who can deep strike with the terminators) with a cheaper lieutenant and just deploy it with the warlord at the fire base. Rerolling those 1's to wound from the very start would earn lots of benefits downrange. The other concept is to replace Calgar and the Lieutenant with Bobby G...(who I just purchased and will build/paint this weekend...)...
All for now. I have other things to try...but yeah, my losing streak is probably 12 games in a row...I'm continuing to bring in new models now...painting stuff...I like the new contrast paint for Ultramarines as their base coat...it helps on the transition to Primaris...But....
Still having my worst gaming year ever,
MING
1500 Points - Narrative Team Event
Synopsis: The Imperium vs Everyone Else - 9 tables each with their own city-fight based scenario, 3 rounds, attackers and defenders! Team Captains determined the parings for each table. I was on the Imperium side...we lost but narrowly. Terrain was awesome, the food was awesome, the beer was awesome, it was a great day and I thank the host for putting it on!
Here are some army tray shots (just part of the 18 competitors):

My display board...Its a new Calgar model!

Looks wet and death-world muddy...

The claw...and chaos....

So misguided...GSC...my round 1 opponent...
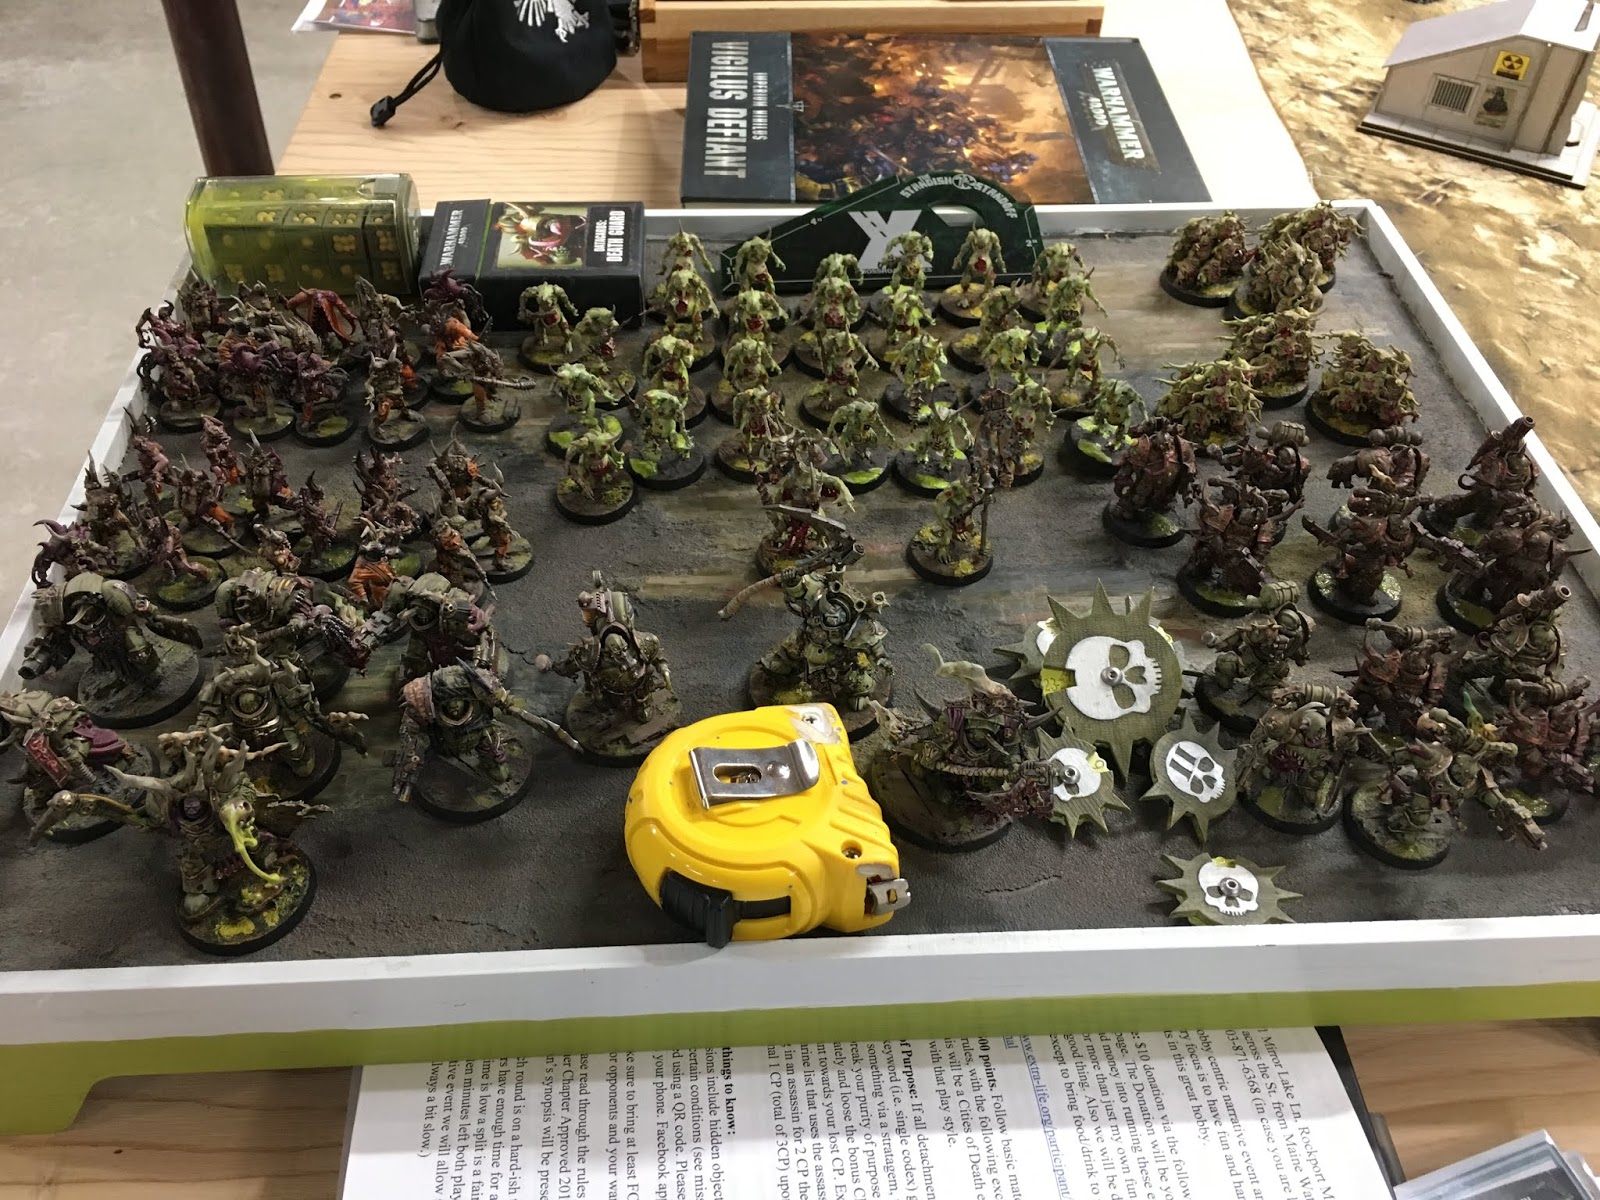
Don't be snotty...be nurgly green!

Well, spray on tans for dreads are a hit...

Ummmm...

Bugs....my round 2 opponent...very creative!

Waaaaaaaaauuuuuuggggghhhhh! Round 3 opponent...

Shiny...
My List: (1500 pts, 11 CP)
Battalion Detachment
Marneus Calgar, Warlord, Ultramarines, Adept of the Codex
Chaplain in Terminator Armor
Infiltrator Squad (5)
Infiltrator Squad (5)
Scouts (5) w/ Camo Cloaks, 4 Sniper Rifles, 1 Heavy bolter
Terminator Squad (5), 1 Cyclone Missile launcher, homer
Venerable Dreadnought, TLLC, HF, DCCF
Landspeeder, HB/TML
Suppressor Squad (3)
Spearhead Detachment
Lieutenant in Phobos Armor
Eliminator Squad (3)
Whirlwind (Castellan launcher)
Whirlwind (Castellan Launcher)
The list has a few multi-purpose functions. The major ones are -
(1) As Ultramarines, everything is +1LD, and can withdraw and shoot at -1.
(2) Calgar was the focus of a firebase, giving rerolls to hit. This fire base would normally consist of the Venerable, and two whirlwinds and Landspeeder. His warlord trait helps to reclaim CPs.
(3) Snipers would take advantage of hellfire rounds on the HB to create more mortal wounds.
(4) Lieutenant, Terminators, and Chaplain created a deep strike reaction force.
(5) Snipers and Infiltrators could deploy forward to create early game board control.
The Games
Overall, I feel like I failed. The list always started strong, but failed around turn 5. Here is a run down of my games and pairings - plus or minus remembered details...
Game 1. Slay the Warlord. I was the defender, and had to deploy my warlord and a few other units in the table center - in this case a four floor ruin and bunker/trenhline. My opponent would deploy around the table edges. My units that were destroyed could become a never ending tide. My other units could enter from a table edge. If my Warlord died, the opponent won. No other primary win conditions. My random secondary was to have a single unit pass three morale checks. My opponent - Genestealer Cult! Needless to say, Calgar died in the ruins around Turn 3, and the unit I hoped to take 3 morale checks also died. My opponent won.
Overall, and I passed this on to the team leader - was that Calgar should have started the game on the top level of the ruin...it might have helped! On turn 1, I was totally surrounded by Blips...no place to run. In reality, it was pretty close. Huge GSC casualties. Very fun game. However, rock saws, GSC deep strikes within 9-inches, etc., and horrible eliminator dice rolls were all were painful. At the end of the game I had zero points for my team.

After deployment...its like the Alamo...

Reserves arrive, but too late...
Game 2. Don't Kill the Troops. I think I was the attacker this time. Table quarters deployment. Primary scoring was killing for points: +3 for warlord, +2 for all other units except troops, -1 (yes minus) for killing troop choices. My randomly selected secondary was something I could not get, like "kill a flyer". My opponent was Tyranids. He had a Warlord, 2 other HQs, one Elite, and 6 troop choices. Probably 94 bug models.
At the end of the game, I had zero points for my team. My opponent only had a wounded warlord off in the far far table corner, I still had Calgar and a few other units. I'd lost like a score of 8-0. This game was just a tremendously bad pairing. But I'd killed 93 bugs in the process. Had to. They were all over me. Actual loss score was probably 8-0.

Turn 1 begins...bugs on the move! I have a bit of buggle wrap...but it wont last!
Game 3. Keep the Loot. In this game there were about 6 objectives, and you scored points at the end of each battle round (after the first) for the number of objectives you held. We had table quarter deployments again. In this case, my infiltrators and eliminators and scouts captured objectives during deployment - so I started the game with 4 out of 6.
My opponent was Orks! They had two or so truk-borne boyz mobs, two or three grot mobs, commandos, Zaggstruck, jumping boyz, meganobz with a truk, weirdboy, and relic shock attack gun, warboss on bike, mechboy on bike, something like 90 models (again).
I started off with more objectives, but I started to lose two of them pretty quick. One objective got cleared of eliminators, captured by orks, recaptured by the landspeeder, recaptured by orks, cleared of orks...in the end I'd lost again, but might have scored my secondary for my team. Final score was probably 5-3. Giant ork dead pile.

Mid game...Chaplain vs the horde...gotta respect that!

Cleanup crew bringing in the pain...
In Closing....
Overall, in looking at the list, the Chaplain just did not deliver, and the new eliminators were a disappointment. Since then I saw a eliminators tactica video which recommended just using the frag rounds...
My MVPs were the Whirlwinds and Terminators and Calgar and Landspeeder. 1500 points is a difficult spot for list building...If I do it again I'll use three Whirlwinds...I love the fact they can hit the entire table.
Since then, I've played a game using the 2000 point list from earlier this summer, but had to swap in a replacement for the regular dreadnought. Overall, I slaughtered the Nurgle opponent's units but fell short again towards the end...I'm peaking mid game...
Feedback on my list variants is to drop the Chaplain. 100+ points for a storm bolter 2+/4++ dude who is mediocre in close combat it just too bad. He does provide a CC benefit, but fails his ncharges half the time. The new concept is to replace him with a jump-pack captain with a hammer...similar number of shots, but far better in CC and still provides a reroll bubble. The other concept is to consider replacing the phobos lieutenant (who can deep strike with the terminators) with a cheaper lieutenant and just deploy it with the warlord at the fire base. Rerolling those 1's to wound from the very start would earn lots of benefits downrange. The other concept is to replace Calgar and the Lieutenant with Bobby G...(who I just purchased and will build/paint this weekend...)...
All for now. I have other things to try...but yeah, my losing streak is probably 12 games in a row...I'm continuing to bring in new models now...painting stuff...I like the new contrast paint for Ultramarines as their base coat...it helps on the transition to Primaris...But....
Still having my worst gaming year ever,
MING
Subscribe to:
Posts (Atom)