We decided to play a 1500 point per side game (750 per player). I was teamed with another German player. This would be maybe the second time I'd rolled out the Germans from my collection for a bolt action game. I made the list on the fly using the Battlescribe tool. It was fun to put together a list built around the collection. It became a hodgepodge of sorts. My team mate had an awesome German army collection though, and we talked briefly to tailor our lists.
The allies (combined Americans and Brits) together really made it like Salerno, soon after the landings as the Allies pushed inland to hook up with the 82nd Airborne who had dropped in on the right flank of the landings. The terrain was really nice - the "club's" Italian table. Dusty open ground around a village crossroads.
Overall, the Germans won the day, and the fighting got close in and nasty at times.
Here...have a look...
THANKS FOR SOME OF THE PHOTOS I BORROWED FROM OTHER POSTINGS FROM THE DAY! YOU GUYS ROCK!
The captions are all mine...
Here is my 750 points. Regular Tiger, Veteran Infantry. One squad is under strength in order to get the Tiger into the list. Regular MMG for support. Veteran officer.
Here is what the British Player was using for 750...his big secret sauce was the squad of Gurkhas. Really nasty in assault. Included in there is the artillery observer...
Bad shot of the Americans. Paratroopers and a Calliope Sherman, including a bazooka support team, other stuff.
Unfortunately I did not get a shot of the other German player's forces...
Battleground before deployment. The battle would be a swirling affair - 1/2 of the Allied force was to start, deployed on the table within 12-inches of the center. On Turn 1, half of the German units would enter from the left. After the first turn, all remaining units would come in from reserves, from any table edge, but not if it was an edge the last enemy unit entered from! This mechanic really made the game a cat-and mouse event.
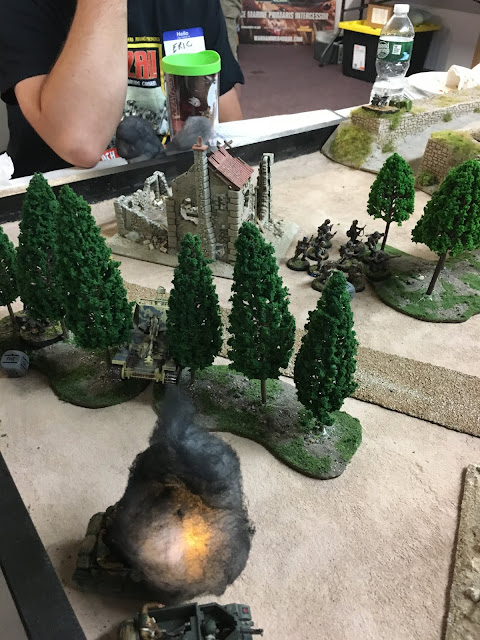
The game started with a bombardment, which put initial pin markers on the deployed allied units. Then the first dice drawn was for the Germans, and I used it to deploy the Tiger into view of most of the allied army. The fear was palpable!
The Tiger drove onto the road and headed towards the crossroads, its two MMGs spitting out fire on the various infantry units stuck out in the open. That hidden marker...LOL...
With the Tiger heading west towards the beach, the Sherman entered from the South. A few units later, the German Heer infantry entered behind the unguarded Sherman and...
Meanwhile, the Bren Carriers arrived in the Heer staging area...the Ghurka's charged out and in a tough fight wiped out a Heer squad and a HQ organizing the attack on the paras. The response was plain. German infantry counterattacked and slaughtered the Ghurkas, and the Bren Carriers (including the British artillery observer) were wiped out...most of the work by the Marder III...
Two or three activation dice later, the British attack was just wreckage.
And then, the Sherman was destroyed by the ol' shaped charge up the tailpipe trick...
With the Allied defenders no on the ropes, it was time to start wiping up...
The Tiger commander decides to just drive on through...the paras just rolled out of the way and let the parade go by...
Trundle Trundle Trundle...doodle dee doo...
More allied troops hiding in the rubble that is Italy...
Fighting spread further towards the west....
Soon after, the Heer units dealt with the Bazooka team, and the Allied players called for an all out retreat. The Germans had stopped the advance.
Overall, it was a bunch of fun.
A few things that had me scratching my head - like...
1. How hard it is to damage an infantry unit in a crater, that goes down...or even out in the open...
2. How charging a string of heavily pinned infantry units with a Tiger won't be successful if their nearby officer helps with morale...they just let the big tank roll on by...
I never used the 88mm Gun on the Tiger...I just kept using the MMGs. If the Sherman had been in my LOS, I would have gone for it.
At one point the American Bazooka team went for a long side shot, but they FUBAR'd their morale roll and shot their load at a nearby British squad instead...
Overall, if we'd spun the table around and my team had played the Allied side, we'd have started the game with the artillery spotter on the table with the Bren Carriers, keeping paras, Ghurkas, and Bazooka in reserves...certainly, units were going to get pinned in the barrage before the game started, but once the main point of the German attack was known (west to east in this case), we could have withdrawn to better cover and looked to take the two German tanks from the rear...the artillery observer for the Brits is a key resource. Our opponents never used theirs. I'd say my game play was sort of meh. The Tiger was not the MVP. It did impact the allies with extra Tiger Fear, but not much else. I was thinking about shooting up the units in the road at point blank range, but after shooting at them for two turns, with little effect but pins, I decided to try to charge through them for a lucky panic roll...again, no effect. The Tiger did, however, help wipe out another American squad that was troubling us far to the southwest. Maybe next time I'll break out the Panther...
Next game in a few weeks...I'll need to come up with a different list. My German collection really needs to be upgraded...


No comments:
Post a Comment