Wednesday, December 23, 2015

Merry Christmas! Happy New Year!

The Ultramarines 3rd Company, Blood Angels 5th Company, and Cadian 555th bid you a great rest of the year!  

May your presents be new models, units, books, dice, Apps, paints, and BEER!

Here are some of my favorite Warhammer 40,000 Christmas images off the web!  I don't take any credit for these!  I just love them!  See you next year!


Friday, December 18, 2015

Ground Pounding - It is the Cadian Way

Captain Jaxxson, 1st Armored Company Commander of the Triple Nickles Regiment, was dreaming at fitful dream.  He was still in the medicae facility recovering from his burns and his command remained shattered.  But he was a tough leader and would certainly recover to once again command his troops.  His dreams though were of a much different conflict...from a past battle or from a certain future one, he could not tell...but the fire and explosions and noise and smells of battle seemed real enough...

1500 Points - Chaos Marines vs the 555th!
OK!  Still busy times! I never dd get a chance to modify my list from two weeks ago - so i just played it.  My opponent - Thor from Creative Twilight!  We both took photos of the game as it progressed, and you can go see his battle report and OPFOR army list here:

http://creativetwilight.com/battle-report-chaos-space-marines-vs-astra-militarum-3/

Triple Nickels Armored Infantry Company

Ground force:
Command squad (7), inc. master of the fleet, master of the ordnance, 2 flamers, commander /w PS/PP; chimera - HB/Multilaser/PMHS
Veteran squad (10), 2 PG, chimera - HB/Multilaser/PMHS
Veteran squad (10), 2 MG, chimera - HB/Multilaser
Lehman Russ Demolisher "Daisy", 3 HBs, Relic Plating
Manticore

Reserves:
Vendetta, 3 TLLC
Scions squad (5)

Warlord trait - all Cadian characters must issue or accept challenges.

Mission: Maelstrom #6

The table is not my favorite.  it is a doubly cursed Necron tomb world...the surface is hard, cold, and the dice gods hate it.  You roll always the opposite of good luck.  Very little area terrain.  Even warp dice suffer here...We set up objectives before knowing the mission. Then I selected my deployment zone...Thor then got to choose to deploy first...and soon after, I seized the initiative...

The Battle
Go see Thor's site!

http://creativetwilight.com/battle-report-chaos-space-marines-vs-astra-militarum-3/

Here are more photos and commentary:

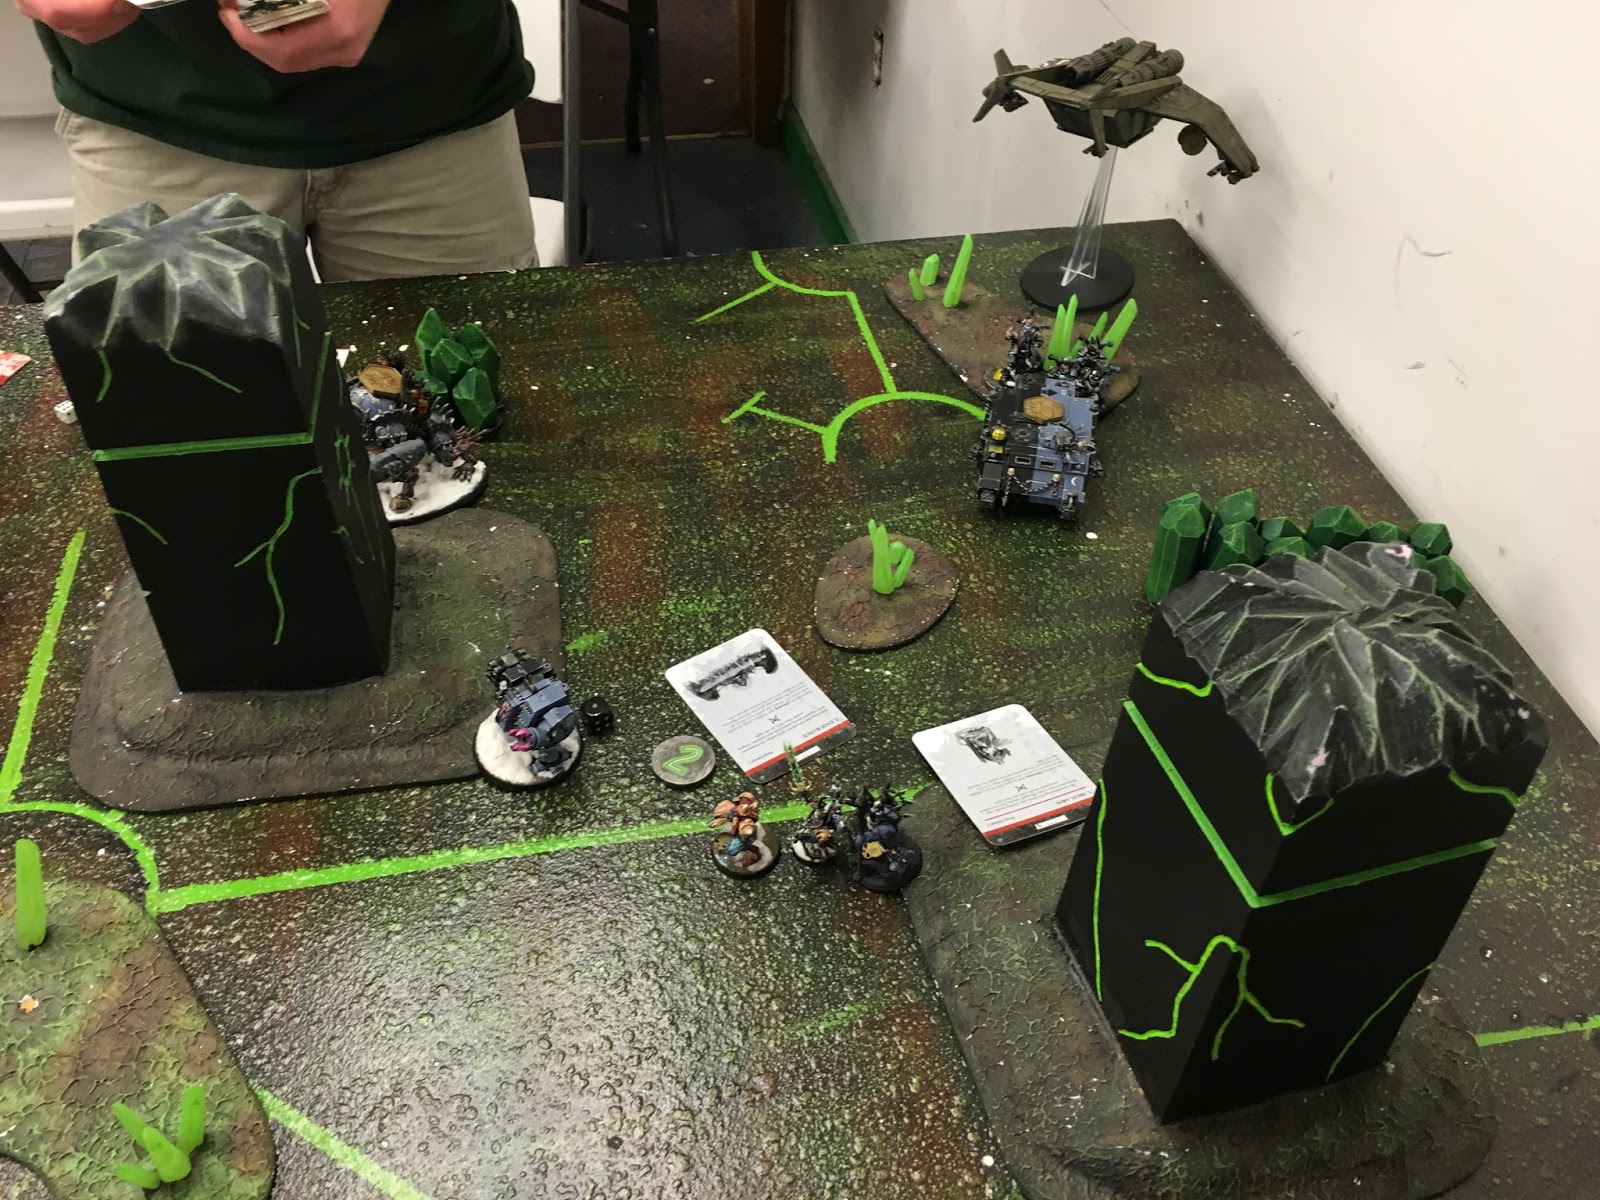
After Cadian Turn 1 - I did get a few wounds on the Chaos Marine force, - but did not get First Blood!  I had pushed forward to get after two of the six objectives.  IIRR I scored on 4 maelstrom cards...discarded one...I'm holding a card for Objective #5 - in the far corner at the top of the screen. I'd pounded out two Manticore blasts and one artillery blast - all missed the mark...

It was such a tiny force...but on a whim, it would be easy for them to control Objectives 2, 5, and 1...but as soon as Thor rolled a dice, one of my Chimeras was blown!

Beginning of Chaos Turn 2 - I moved up onto several objectives but had a brain fart.  #3 was left empty - which would have yielded another point...My focus was on the oblits and terminators at the moment... the Chaos marines were about to respond...but I'm looking to kill the assaulty stuff first....

You can see from my 5 tactical cards I'd been card-locked - IIRR three of the 5 cards were to be awarded if I assaulted stuff...

So yeah, here they are...

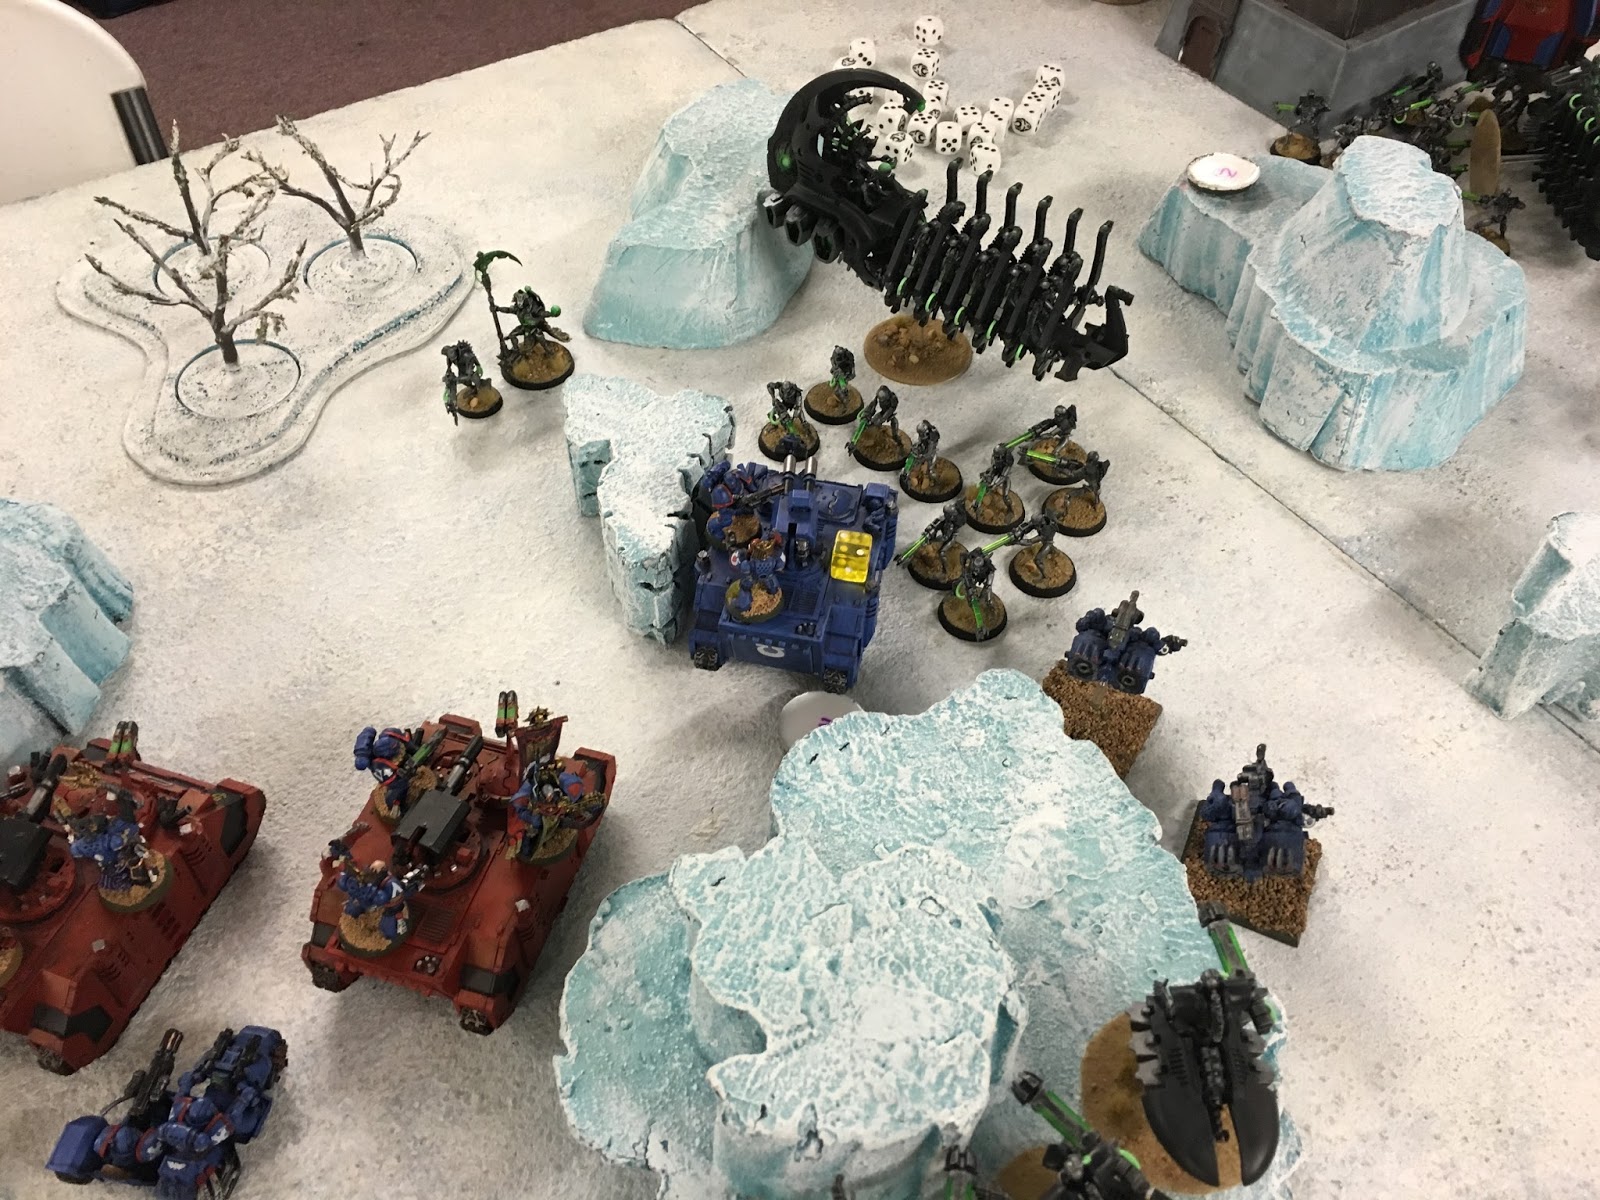
But...when the Chaos Rhino zoomed off to Objective 1 to score a point...it meant no cover for the Chaos main force - except for their sorcery granting them stealthiness...but after a demolisher shot, Mantocore, and Artillery barrage follow-up...the center looked like this...

And this...

Here we are at the end of my turn...orders from the commander had gotten the pinned squad back in the fight - so after shooting they spread out - trying to head toward Objective 3...not making it.

End of Cadian Turn 3.  Back in Turn 2 Thor got his Helldrake on the table - who scorched up the dismounted squad and immobilized another Chimera.  His now-dismounted marines from Objective 1 had exploded Daisy!  In turn 3, I kept up with what firepower I had!  The lone Veteran, running at objective 3, followed his orders!  He even got a hull point on the Drake'......I'm at about 8 points...one card left - for objective #5...

Turn 4.  In turn 3- Thor had hovered the Helldrake over to Obj #4 for a point...On my turn I moved back to #4 with an obsec unit. and moved the command Chimera to #3, another onto #6.  We are both at 9 points or so.  Neither is drawing great cards!

I even had zoomed the Vendetta off to the corner at Obj #5.  If anything, I'm using that to keep the Chaos forces to try and stop me from scoring that card! I'm spending alot of dice on the Helldrake, but it is jinking and repairing...IT WILL NOT DIE!

Cadian Turn 5!  So the Vendetta swings around on Hover mode and discharges the passengers!  Firing was horrible (shrouded marines in cover) - we contest #5!

Turn 5 Thor is down to the Drake, two Sorcerers, one oblit, oand 4 chaos marines...but he has cards to score!  We are basically tied about 11-11.

Turn 5 (or 6) - I'm thinking - kill the Helldrake!  I need Linbreaker! Thor has a card for Obj #6 and I have one for #5.

Meanwhile at Obj#5...I really need to get these guys painted!

As Thor discussed - here is where we are calling the game.  His Drake is gone, I have linebreaker.  Another turn and I'd have had Obj. #5 (maybe)...and he might have lost his warlord...

Cadian Victory 12-11!!!

Time to reload the Manticore and req a new Daisy from the motor pool....

Hope you enjoyed this!


Tuesday, December 15, 2015

The Curious Report of the Tau and of a Rogue Inquisitor

Captain Jaxxson, 1st Armored Company Commander of the Triple Nickles Regiment dictated his report to the Scribe.  He was resting, rather uncomfortably, in the regimental aid station, his hands and face covered in burn ointment.  In beds nearby was most of the rest of his command.  Jaxxson talked in matter-of-fact tones.  The only sounds were the scratching of the scribe's pen, the wheezing and moans of the wounded, and the mechanical noises of the medical servitors.  The two most important people in the room were silent, both grimly listening to his words.  In the dim light beyond his bed, Inquisitor Paulus and Commissar Locke both stood.  They had arrived almost as soon as the Captain had been brought in.  They would not stop their investigation for something as petty as the near destruction of a Cadian Armored Company.  They were here specifically to determine the truth behind the reported siting of  what appeared to be an Inquisitorial unit working with the Tau...The Commissar's hand never strayed far from his pistol.  The Inquisitor's hand never left his staff...The scribe kept writing...

Battle Report - 1500 Points
Tau plus Rogue Inquisitorial Allies vs Astra Militarum

OPFOR - 
Hey, this battle occurred about 12 days ago...Its hard to remember.


  • Ghostkeel / Stealth Suit Formation
  • Tau Hunter Cadre Detachment - Battlesuits, Missile Suits, Warriors, Missile tank, scouting skimmer, Buffed Commander, pathfinders, drones...
  • Inquisitorial henchman mob, level 1 Rogue Inquisitor
  • Assassin....

1st Armored Company, 555th Regiment
This was a battle I had not been prepared for - I'd just grabbed stuff and headed out for club night - which is never a good thing!  I ended up dropping 350 points off an older stock list - giving me:

Ground force:
Command squad (7), inc. master of the fleet, master of the ordnance, chimera
Veteran squad (10) , chimera
Veteran squad (10), chimera
Lehman Russ Demolisher
Manticore

Reserves:
Vendetta
Scions squad (5)

Mission
We rolled off randomly and ended up playing a mission with 4 objectives, each worth 3 points, mo maelstrom cards, with short-edge/deep deployment zones.  I tried to get my objectives as far apart as possible - my opponent placed his centrally.  

Deployment
The terrain was all ruins.  I deployed first with the intent to go first.  That said, I deployed a core force of the Demolisher, command squad, and two veteran squads forward, with the intent of forcing them up the center, with two squads back to act as a follow on-wave / response team.

My opponent deployed as forward and dense as possible.  I was thinking that was pretty good for me...

And then he scouted forward - with the inquisitorial faction on my left, and the Tau opposite my center and right.

Things went downhill from there....

The Game
The game after deployment and scout moves....ready for the IG to begin turn 1.  The Assassin is in the open for crying out loud...but its that kind you can only snap fire at...the Ghostkeel formation is on top of the container boxes...

Here we are in Turn 2...is the Ghost invisible?  No...It was kind of funny.  The Tau formation was leading with the Ghost.  Its T5. Dorris the demolisher shot at the tau unit following the Ghost formation.  The large S10 blast deviates and lands on the Ghost.  He rolls a 1 for a save and blink...no Ghost.  The Manticore contributed to a bunch of losses, as did the officer of the fleet.  I started to lose vehicles to "rear targeting, you get no cover, S7 missile systems" though...

At this point, the Tau had first blood....I'm wishing I had ignores cover artillery....

Still Turn 2....the tau are thinking about getting the (wounded) Assassin into assault, followed by the next wave of henchmen.  

Here we are around Turn 4.  I'm still stuck in my deployment zone.  In Turn 3, the assassin lost in assault to lose its last wound or so, after taking out about 9 guardsmen.  Dorris the Demolisher was exploded by some form of missile hit.

Meanwhile the last operating Chimera is making a break for it.  

IIRR the Vendetta arrived Turn 3...I also had forgotten the Officer of the Fleet...I'd decided I needed to get into his backfield, trying to take out his (only) hover tank.  The Scions were to deploy and get on the objective at that pile of pipes in the center...

The Vendetta took a lucky hit, but stayed in the air.

This fight was interesting...stealth suit vs Cadian trooper...the trooper was obsec...

The Vendetta hovered over to disembark the Scions.  They got slaughtered though...but they did shoot up the tau squad on the objective.

Pretty much end of game shot...smoking wrecks all over.

End of turn final score 8-3, Tau are victorious.  

I think I had a total of two models left on the table.  The Triple Nickles took a beating!  The biggest issue, ultimately, were the ignores cover, hit you on the rear armor, split firing missiles from the Suits. They accounted for all of the wrecks!  I tried to hit the Suits with big blasts, but they made most of their saves each turn.  Regardless, my opponent has been trying this Tau+henchment+assassin list for a bit and plans to use it for the upcoming campaign the FLGS is putting on.  I'm wondering if he'd be better served with just a pure Tau list!  

Anyways, back to the drawing board.  I need a strong 1500 point IG list...got any ideas?


Wednesday, December 2, 2015

More Standish Standoff Pix

Well, I've been too busy as usual to write up a report to go with my three battles, and was to busy at the event to really write up something for the top table action.  But!  I want to get these off my i-phone, so here are the top pictures by game with commentary!

Game 1 - Ultramarines battle Company vs Nurgle

Turn 1...I set up first and went first.  I'd held one pod, and the HF/MM landspeeders in reserves.  Unfortunately I'd whiffed the command squad taking out the Defiler, but I'd fix that in turn 2.

Just another view - up in my left.  The Nurgle army was about to respond.

Turn 4...nearly the end.  Every one of my games fought through turn 4, which was great.  A lot of players reported problems getting that far in the time limits.  At this point I was mopping up what i could.  The keystone of the opponent's list was the two Nurgle demon princes with essentially 2+ rerollable cover saves on them.  After learning that, I baited or ran from them, focusing on the other units I could damage.  

Final score for raw maelstrom points.  13-8, which, plus bonuses, would move me to table 2 in round 2.  But, before that, we had lunch, pub quiz, and painting comp to get through.

Game 2 - Ultramarines battle Company vs Eldar

Deployment.  Not much for area terrain, but lots of LOS blocking.  This time I started with the HF/MM speeders on the table rather than in reserves.  The cost me two points...

Turn 1 - Pods drop in so I can grab objectives and points.  The target for this squad was his jet bikers...this squad had the grav and combi-grav guns, and took out half the bikers which was good, but not great,

Middle of Turn 2.  All of my pods are in...my opponent still had units in reserves.  The game turned into a very close match, with bad card draws for both of us.  Still went 4 turns.

Turn 4 - I think the score at the moment was a mere 5-6.  He was thinned out alot - pods with Deathwind launchers did a good share of shooting.  I forgot that I had two auspexes though...those might have helped in one instance.

Just another view at the end.

Losing this game pushed me back to the table I started on - #4.

Game 3 - Ultramarines Battle Company vs Necrons

Middle of Turn 1 - Table quarter deployment. I got to go first again, and dropped two squads in the back corner - the focus of the points for the game was to be the center and objectives.  I was looking to paste my opponent with a distraction, and it seemed to work.  

Middle or so of Turn 2.  I've got points growing, things are looking good.  The Whirlwind Suppression force is doing its job.

This area became a focal point of the game - bonus points were riding on who controlled the center of the table (marked as an objective next to the snow pile and Rhino). I'd need to clear those warriors to keep it objective secured.  

Turn 3.  I'm typically using a big red dice for game turn, yellow dice for hull points remaining.  His Arks are wrecked, but now he has his flyers on the table.  They caused a lot of havoc, BUT it was avazing to see them shot down to massed fire - even after jinking.

Probably the best thing I'd done in deployment was get that plasma cannon squad on the tower.  They were stuck there, but it gave them great LOS.

Apparently I did not take pictures after this one. Eventually his Overlord wrecks the Chaplain's Razorback, forcing him to dismount.  The Captain gets out early, in order to be available to charge the Overlord on the last turn (which he did) - but in the end, we were stuck in combat.  In the mean time, the Tacticals and speeders eliminated the warriors to make sure the center was mine.  In the end, I had enough points to propel me back to being tied for second place in total points, tied with the player I'd lost to in Game 2!    

Preview of things to Come?
Just two parting shots - I did finish my oath for the Rage to Salvation event over at Bolter and Chainsword - completing a Furioso Dread and another 10 Death Company Marines!


This will allow me to play some lists and formations I could not do before!

Hope you enjoyed the shots,

MING