The game play was awesome. Each player provided a 750 point list, following the Normandy selector. The head judge assigned tables more or less on arrival, so each approx. 6-foot zone had two players per zone. The equivalent of about 8 depleted platoons per side. There was no further "historical" guidance on force selection. The game started with 8 dice per side, and each table acted on that activation.
I'd assumed in my planning a few days before that I'd be fighting in hedgerows or a village, so I had a mixed force of paratroopers from the 502nd PIR just reinforced with some mechanized support (4th ID just off the beach) to take on my mission. At the last minute, however, my mission was changed to bunker clearing along the beach as the landing was widened westward towards Cherbourg and the Cotentin Peninsula. For this, my platoon was joined by another combined team of US Rangers and more infantry from the 4th ID. Neither my platoon or the supporting platoon was ideal for this job, but we talked out our attack and made the best of it.
My List:
502nd PIR -
Paratrooper Platoon HQ - 1st Lieutenant and two runners, all with submachine guns.
Paratrooper Squad, 10, rifles, 1 LMG team.
4th ID -
Veteran Infantry Squad, 10, rifles, 1 BAR team
Regular M3 halftrack, pintle HMG, rearward MMG
Veteran M4 Sherman, Coaxial mmg, hull mmg, wet storage.

My force, ready to go.
My support buddy's list:
Rangers:
Ranger Squad, 10, SMGs and rifles, cliff climbers
Ranger Squad, 10, SMGs and rifles, cliff climbers
4th ID
Regular Infantry HQ, 2nd Lieutenant and runner
Regular Infantry Squad, 10, rifles
Bazooka Team
Mortar Team
Scenario
As a special rule for the event, the german players could deploy up to half of their units (per player) on the table, at any location, and the remainder would enter following reinforcement rules turn 2 onward. The Allied players would enter any units they want turn 1 using a run or advance order. We had to deploy on the assigned table, but, you could support the adjoining table if needed.
There were 4 bunkers on our beach front. We were tasked to take them. Our table had the simple win condition of 1 point per bunker. Side with the most bunker points wins. Other tables had their own different win conditions. All of the win conditions favored the defender.

Beach with the cliff at the south end. Montebourg in the distance.
Deployment
My team partner and I watched the germans deploy and studied the terrain. A pak40 ATG and an 88mm ATG were deployed in bunkers, as were two MMGs. Mortars were deployed with spotters in trenches further back. We realized that due to the layout, there was a blind spot in the terrain through which we could advance to largely mitigate the ATGs (right below the cliff at the eastern end of the beach). We'd still be susceptible to other fire, but not those weapons! Our plan was for the rangers to enter and take the bunker on the high ground immediately to our left, and all other squads to advance rapidly behind the tank and half track to gain the access to the next two bunkers in line. Regardless, the bunkers were 3 feet into the table, so even with just running it would take 3 turns to get to most of them, plus you could only assault the bunkers from the rear doors...
The game started with a preparatory bombardment that placed a few pin markers on the enemy but little else.

View after the bombardment - pins here and there.
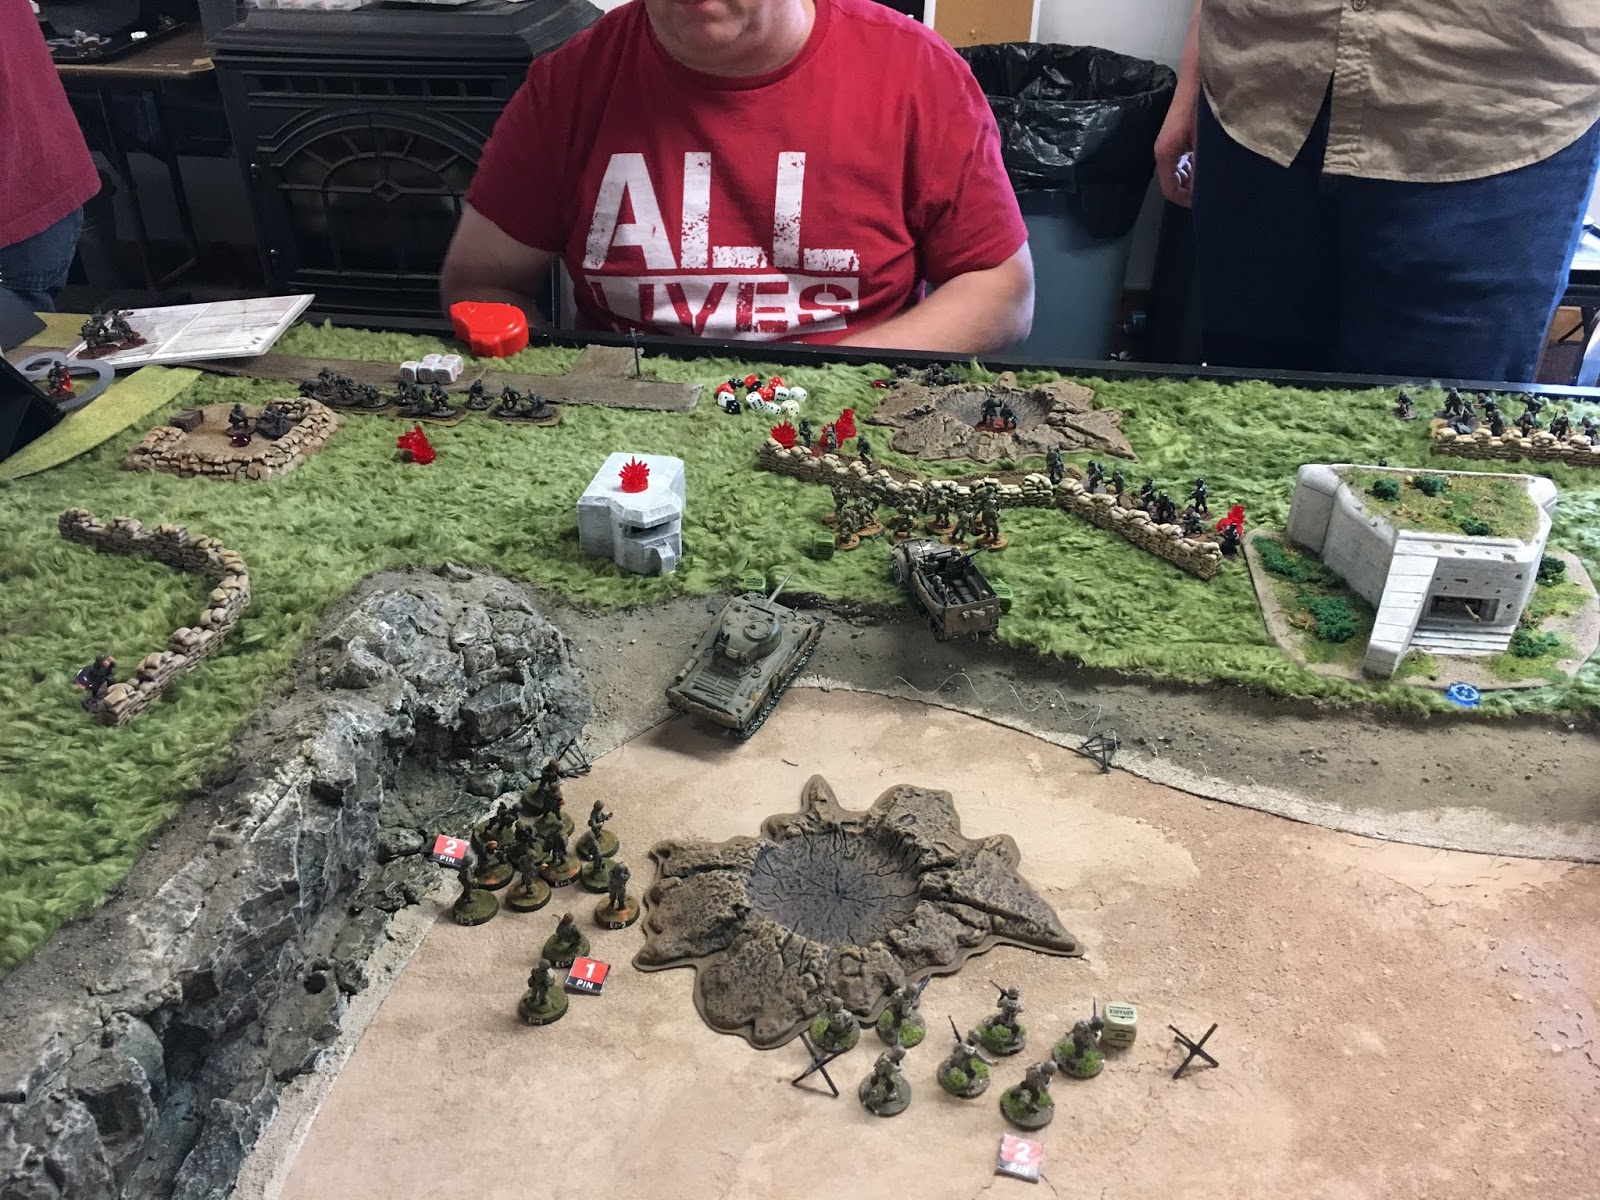
On turn 1, we started with a good run of allied activations. The Sherman Tank and Halftrack full of veterans ran up the base of the cliff followed by the paratroopers. The rangers came next, immediately taking two actions to enter and scale the cliff. They were all followed by the regular infantry - which in the fog and confusion of war decided to flank the attacking force, straying into the line of sight of german guns and artillery/mortar spotters! One ranger squad had climbed directly into the face of the 88 gun, and took a danger close blast in the face.

Units beginning the attack! That regular infantry squad should have stayed in cover!

Rangers scaling the cliff see the gun barrel crank towards them!
On turn 2, the dice began with the arrival of a german artillery barrage (16 inches in diameter) which dropped a big pile of pin markers all over the assault force and a few casualties. Our assault force continued to run directly at the two bunkers ahead (#2 and #3), while the rangers began work on securing bunker 1.Several german reinforcement units began arriving and they ran towards the edge of the beach to take positions in their trench line.

German reinforcements start arriving and man their trench line! Rangers have made quick work of Bunker #1 and I'm stalled in front of Bunker #2.
On turn 3, our mortar team began dropping smoke to obscure the pak40 bunker. The Sherman and halftrack began suppressing the german troops in a trench line just uphill from the beach. Bunker 1 was secured through assault. The german MMG team in bunker 4 abandoned their post and began running south (left) to try to get into a useful position.
Paratroopers are pinned by bunker #2, while the veterans of the 4th ID carry their attack to the trenches only to be wiped out by a crossfire! Where did the rangers go?
Turn 4, we received some assistance in the form of an infantry squad from the inland assault on Montebourg firing on germans in the trenchline behind bunker #2.The Sherman stopped at the beach edge to take up a better firing position on the trench line - and staying beyond reach of the panzerfausts! The half track advanced into the trench line area and the veteran infantry dismounted to decimate a german squad there. They were met with withering return fire from other german units which eliminated the squad. The paratrooper squad was set to assault Bunker 2, but was met with fierce fire from bunker 2, forcing them down (pinned!). German units from the north end of the beach all began streaming south (left), but more smoke shells from the mortar team obstructed their view to the beach.

Firing into the trench line! The infantry will fail to get to Bunker #3...

Smoke is helping, We have cleared Bunker #2, but Bunker #3 is being reinforced and the germans have abandoned Bunker #4. The halftrack has pulled forward to clear the LOS for the Sherman.
Turn 5, with 5 pin markers, the paratroopers passed their leadership and assaulted and took bunker 2. In response, entrenched german gunners began shooting them up. One german squad assaulted the nearby paratrooper HQ unit, and lost! The HQ unit then assaulted the next german unit in the line and won again. Then they were shot up and eliminated from the fight. The untouched Sherman continued using just MMG fire to suppress and pin german units, focusing on anything with an anti-tank capability.

Rangers on the top of the dcliff have a sweeping view of the dwindling germans on our flank! Remnants of the paratrooper squad take cover at bunker #2.
On turn 6, we wrapped up the assault, keeping the germans pinned around bunker #3, but we were unable to reach it.
Far and away inland, the battles also pitched back and forth. The overall victory for the side was seen as a slight (minor) german victory (minor german at Montebourg, minor allied in the hedgerows, and minor german at Valognes). The germans still held the two towns, but lost in the terrain between.
In the Montebourg section, an allied win was only achievable by capturing the church and holding it. It was in the middle of a town square. Nearly impossible. An allied player almost did it though by assaulting through the front door on turn 6...it was that close...
Overall, awesome effort by all!
The best learning moment for me was how mortars can be used to deploy smoke. Never though of that in previous games. ALSO as a house rule for smoke - rather than having smoke shells deviate up to 12 inches on a miss to a point selected by the defender, we went with random direction, 2D6 for initial smoke placement. It was terrific, and worked great for a team game. I also read up on using tanks to assault infantry. I considered doing it on Turns 5 and 6, but decided to just keep firing...
I'd consider my 750 point list to be great for this game. If we went with slightly bigger lists I'd try to squeeze a mortar in for the smoke...or a FOB to call in a barrage or air strike...or flamethrowers....
There is another bolt action day this weekend! Hoping to get another game in!
All for now,
MING
Excellent BatRep, Brian!
ReplyDeleteFull agreement on the house rule for using smoke! The rule as written is utterly broken. You can tell that as *nobody* uses smoke - it’s a dumb choice as it’ll land bang-on target 87% of the time ...where your *opponent* wants it to land. Utterly asinine! 😖
Making it scatter 2D6” in a random direction makes it worthwhile and our game showed that. It’s inaccurate... but often still useful. 👍🏻😀
Your post was a great read as it gave a good run-down of the battle on your end of the board. Plus, you did a great job of setting our game into the historical context. 👍🏻
- Larry
Thanks! In reality I should have tried to get Bunker #3 with the veteran infantry squad, but their job was to clear the trench line before more germans arrived to refill it! Overall, we did the job - bunker #4 was abandoned, #3 was rendered ineffective due to smoke, and #1 and #2 were cleared. The Sherman did not get scratched. I was interested to see how the HMG on the halftrack would work, but it just as well could have been replaced with a MMG. I needed more lead flying downrange!
ReplyDeleteYeah, I’ve found HMG’s to be underwhelming. ��
DeleteIf you pay the points to “upgrade” from an MMG to an HMG you drop
from RoF 5 to 3 and all you gain a Pen +1.
If you’re Shooting Infantry it’s a bad “upgrade”;
perhaps if you’re shooting soft-skinned or light vehicles it’s worthwhile...?
I find that sending 5 shots down-range per Action works fine. ������